How to Test a Car Battery With a Multimeter: The Complete 3-Stage Diagnostic Protocol

A digital multimeter tests your car battery in under ten minutes. Many drivers replace good batteries by mistake. Corroded cables, bad starters, or broken alternator diodes mimic dead batteries. This three-stage test finds the real problem at home. It saves you an expensive shop fee.
The 10-Minute Multimeter Test: What Your Battery Voltage Means Right Now
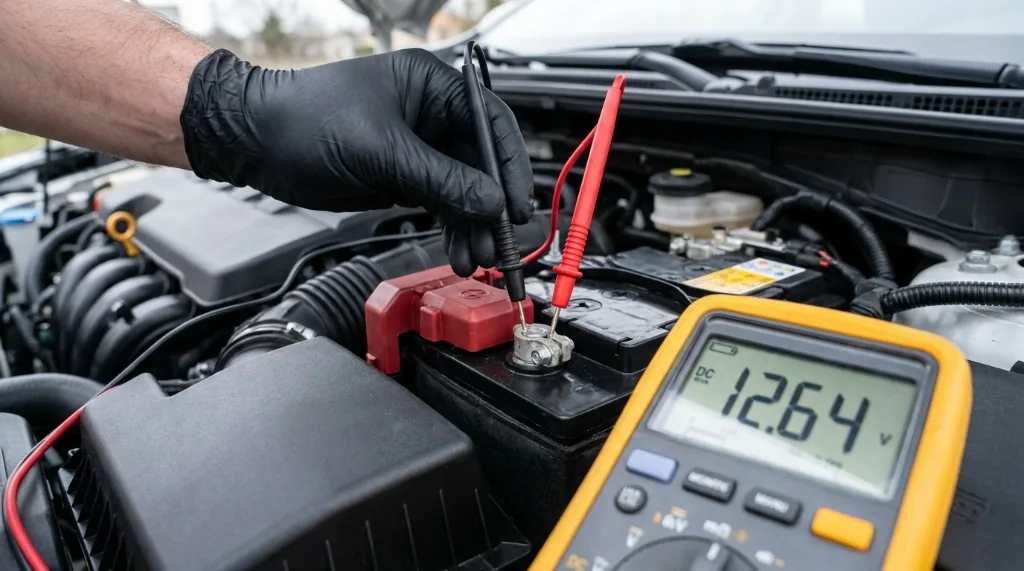
A healthy car battery measures 12.60V to 12.66V with the engine off. Modern AGM batteries measure slightly higher at 12.80V to 12.90V. A reading between 12.00V and 12.40V shows a depleted charge that needs external charging. Any reading below 11.90V indicates severe discharge. Recharge the battery fully and retest before declaring cell failure.
Car batteries work as chemical storage units. Six linked cells sit inside the plastic case. Lead plates sit immersed in liquid acid. Together, they produce electric power. If your car hesitates to crank, check our guide on signs your car battery is dying first.
Relying on resting voltage alone causes diagnostic mistakes. A battery can show 12.68V on a workbench despite heavy plate sulfation. Once placed under dynamic load, high internal resistance drops terminal voltage. Running a loaded test prevents misdiagnosing a damaged battery pack.
Prepare Your Multimeter: Dial Settings, Probe Ports, and Range Selection
Plug the black lead into the port labeled COM. Plug the red lead into the port marked with a V. Turn the selector knob to Direct Current Voltage. Look for a capital V with a straight line. Set the dial to the 20V position for accurate readings.
Using the wrong input jack blows the meter fuse. Most meters feature a separate 10A port. That port measures electrical current in series. Never plug the red lead into the 10A jack to test battery voltage. Doing so creates a direct short circuit. The internal fuse blows instantly. Keep the red lead in the voltage port. Test lights work for simple power checks. But our guide on test light vs multimeter explains why bulbs cannot read exact voltage drop.
Manual 20V Scale vs Auto-Ranging Detection Traps
Set manual meters to the 20V DC position. Car electrical systems operate between 0V and 16V. The 2V scale overloads the screen display. The 200V scale loses single-decimal detail. Auto-ranging meters choose the range for you. However, pulsed alternator current can confuse auto-ranging sensors. Lock your meter to DC mode to stop jumpy numbers.
What If Your Meter Only Has 10V and 50V Settings?
Older analog meters often use 10V, 50V, and 250V scales. Never pick the 10V setting on a 12V car battery. A 12.6V battery pushes the needle past the stop pin. That bends the delicate needle mechanism. Turn the knob to the 50V DC range instead.
Read the numbers along the middle black scale line. Each line indicates one full volt. This setting lets you separate a full 12.6V charge from a flat 12.0V battery.
Clear Surface Charge: The 2-Minute Headlight Protocol Before Testing
Driving your car or using a battery charger creates an artificial surface charge. This float charge can show 13.4V on a failing battery. Turn your headlights on high beam for two minutes with the engine off. This draws off the surface charge. Turn the lights off and wait five minutes before testing.
A five-minute rest lets internal plate chemicals stabilize. Testing right away gives a false reading. A dying battery might read 12.8V. That trick convinces you the pack is healthy. Removing surface charge reveals the true state of the lead plates.
Stage 1: The Resting Voltage Test (Flooded vs AGM Reference Matrix)
Check both battery posts for dirt or blue corrosion before testing. Clean dirty posts with a wire brush. Push the red multimeter probe firmly against the positive lead post. Push the black probe against the negative post. Read the resting DC voltage on the meter screen.
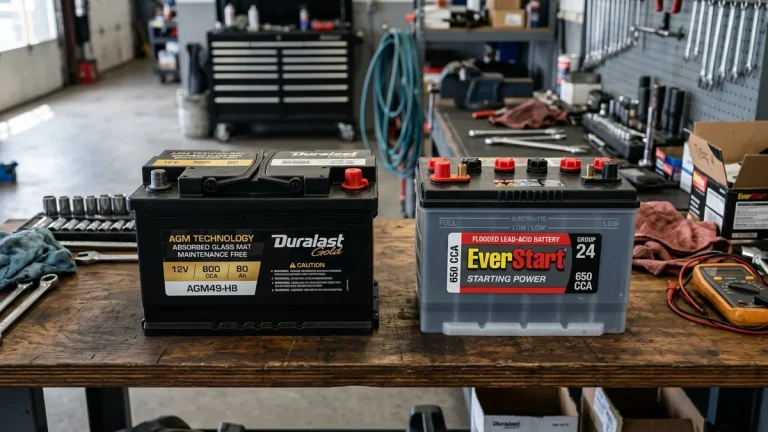
Flooded and AGM batteries show different resting voltage. Standard flooded batteries rest at 12.60V. Modern Absorbed Glass Mat batteries rest higher at 12.85V. Glass mats hold the acid tightly against the plates. Cars with auto start-stop use AGM batteries. Read our guide on AGM vs lead acid car batteries to confirm your pack type.
Match your resting voltage against battery charge at 75°F (24°C).
| State of Charge (SoC) | Flooded Lead-Acid Voltage | AGM Battery Voltage | Voltage Per Cell | Chemical Status & Action Required |
|---|---|---|---|---|
| 100% Fully Charged | 12.60V to 12.66V | 12.80V to 12.90V | 2.10V to 2.15V | Optimal chemical saturation. Ready for service. |
| 90% Charged | 12.50V to 12.55V | 12.70V to 12.75V | 2.08V to 2.11V | Normal operational reserve. No action needed. |
| 75% Charged | 12.40V to 12.45V | 12.55V to 12.60V | 2.06V to 2.08V | Slight depletion. Recharges during normal highway driving. |
| 50% Discharged | 12.20V to 12.25V | 12.35V to 12.40V | 2.03V to 2.05V | Plate sulfation begins. Requires external smart bench charge. |
| 25% Discharged | 12.00V to 12.05V | 12.10V to 12.15V | 2.00V to 2.02V | Severely discharged. High risk of complete morning starting failure. |
| 0% Depleted / Deeply Discharged | 11.90V or lower | 11.95V or lower | Under 1.98V | Severe discharge or possible cell damage. Recharge fully and retest. |
Why a Sulfated 12.6V Battery Fails Under Starter Load
A battery reading 12.64V can still fail to crank an engine. Digital multimeters use high internal resistance of ten million ohms. The meter pulls less than one microamp during a test. It displays surface voltage across worn plates. This static reading masks hidden chemical breakdown.
Engine starters need 200 to 300 amps to spin. Bad lead plate sulfation creates high internal resistance. Under heavy starter load, terminal voltage collapses to four volts. The starter solenoid chatters and fails.

Stage 2: Test Battery Voltage While Cranking
Place the multimeter on the windshield facing your driver seat, or ask a helper to turn the key. Keep the probes firmly on the battery posts. Crank the engine for three seconds. Watch the lowest number on the screen. A healthy battery stays above 10.0V while the engine cranks.
Voltage dropping below 9.60V at 70°F (21°C) suggests weak starting power. Use this threshold as a practical diagnostic guideline. Actual results depend on ambient temperature, engine size, and battery rating. Voltage above 11.5V with zero starter draw points to an open circuit. Check the starter relay, solenoid, ignition switch, and grounds before condemning the starter motor. Check our guide on what does a bad starter sound like for starter diagnostic checks.
The Inrush Current Dip vs Sustained Cranking Voltage
Ignore the first split-second dip on the meter. When the starter hits the flywheel, stationary motor windings draw heavy inrush current. This initial spike pulls voltage down to 8.5V for a brief fraction of a second. The starter then begins to spin.
Look at the voltage once the motor spins. A healthy battery holds above 10.2V while spinning the engine. During winter freezing weather (32°F / 0°C), starter voltage can drop to 9.2V. Cold temperatures slow chemical reactions and thicken engine oil.
Stage 3: Test Alternator Charging Voltage and AC Ripple
Keep the multimeter on the battery posts and start the engine. Let the motor idle in park with all lights and accessories turned off. A good alternator outputs 13.80V to 14.80V DC to charge the battery. Voltage under 13.50V signals a weak alternator. Read our guide on dead battery vs bad alternator to isolate the charging fault.
How Inexpensive Multimeters Read Inaccurate AC Ripple
Car alternators generate three-phase alternating current. Six diodes convert that power into direct current. A damaged diode leaks raw AC voltage into your vehicle electrical system. This ripple boils battery acid and harms your car CAN bus system. Test the diodes right away.
Switch your multimeter to AC millivolts (mV AC) to inspect the diodes. A healthy charging system typically shows under 50 millivolts AC ripple. Higher ripple points to bad alternator diodes. Exact limits depend on alternator model and engine speed.
Inexpensive multimeters lack DC-blocking filters and True-RMS hardware. When set to high AC scales, basic meters average DC voltage and show false high readings. Use a digital multimeter designed to measure low AC voltage in the presence of DC.
Modern BMS Logic: Why Smart Alternators Drop to 12.8V at Idle
Modern cars use smart Battery Management Systems (BMS). A post sensor monitors battery temperature, charge level, and electrical demand. When the battery reaches full charge, the computer may reduce alternator output to 12.8V. This variable charging cuts engine drag and saves fuel.
Never condemn an alternator based on a 12.8V idle reading alone. Turn on high beams, the cabin heater blower, and the rear defroster. Adding electrical load prompts the computer to raise charging output. Exact charging voltage depends on factory software logic. If voltage continues dropping while driving, check why a car battery dies while driving before replacing parts.
The Voltage Drop Bypass: Testing Cable Clamps and Chassis Ground Straps
A battery and alternator can read normal while bad cables starve the starter. Voltage drop tests measure millivolt loss across cables under load. Any reading above 0.05V DC between the battery post and cable clamp proves poor contact. Clean the connection with a wire brush.
Set your multimeter to DC Volts on the 2V or 20V scale. Place the red probe on the positive lead battery post. Place the black probe on the metal cable clamp. Have a helper crank the engine. A clean joint shows 0.00V to 0.03V. If the reading exceeds 0.05V, corrosion is choking current flow. Remove the clamp, clean both surfaces, and tighten the bolt.
Test the engine ground circuit next. Place the black probe on the negative battery post. Touch the red probe to clean metal on the engine block. Crank the engine. Ground circuit loss must stay below 0.20V DC. If your meter shows 0.50V or higher, the engine ground strap has corrosion or loose bolts. This defect causes slow cranking and triggers weak battery rough running symptoms.
Diagnostic Results Matrix: What Your Multimeter Numbers Tell You to Do Next
Compare your resting voltage, starter crank drop, alternator output, and ground circuit loss against this table. These numbers pinpoint discharged cells, loose belts, bad diodes, or dirty cables. This systematic check lets you choose the correct repair action without guessing or paying diagnostic fees.
| Resting Voltage | Cranking Voltage | Running Output | AC Ripple (mV) | Definitive Diagnosis | Correct Repair Action |
|---|---|---|---|---|---|
| 12.60V to 12.85V | 10.20V to 11.00V | 14.00V to 14.60V | Under 50 mV | System Fully Operational | No action required. Clean terminal grease and inspect bi-annually. |
| 12.55V to 12.68V | Under 9.60V | 14.10V to 14.50V | Under 50 mV | Probable Internal Plate Sulfation | Test with carbon pile or conductance tool. Replace if capacity fails. |
| 11.80V to 12.20V | Under 8.50V | 11.80V to 12.20V | Under 50 mV | Dead Alternator / Snapped Belt | Replace alternator and recharge battery fully on a bench charger. |
| 12.60V | Over 11.50V (No Crank) | N/A | N/A | Open Starter Circuit, Relay, or Solenoid | Check ignition switch, starter relay, neutral switch, cable connections, and solenoid. |
| 12.60V | Under 9.60V | Over 13.80V | Over 100 mV | Probable Alternator Diode Leakage | Bench test alternator. Replace rectifier or alternator unit. |
| 12.60V | 10.50V | 14.20V | Under 50 mV | High Terminal Voltage Drop (>0.05V) | Remove clamps, scour corrosion with wire brush, and re-torque hardware. |
Frequently Asked Questions About Multimeter Battery Testing
Can I test a car battery with a multimeter without removing it from the car?
Yes. Testing the battery inside the car lets you check starter draw and alternator output under real loads. Remove the battery only to test bench charging or workbench self-discharge.
What should a 12V car battery read when the car is completely off?
A standard flooded battery reads 12.60V to 12.66V when fully charged. An AGM battery reads 12.80V to 12.90V. A reading below 11.90V signals deep discharge. Recharge the battery fully and retest before replacing it.
Why does my multimeter read 12.6V but my starter only makes a clicking sound?
A multimeter draws almost zero current. It only reads surface voltage across worn plates. When the starter demands 250 amps, internal plate resistance collapses voltage below five volts. That voltage drop causes starter solenoid clicking.
How do I test a car battery with a multimeter by myself without a helper?
Set your meter on the windshield facing inward toward the driver seat. Connect alligator clip leads to the battery terminals. Turn the ignition key while watching the screen through the glass. You can also record the screen with your phone camera.
Can a digital multimeter measure the Cold Cranking Amps (CCA) of a battery?
No. A multimeter measures voltage, not amperage capacity. But watching voltage during a 3-second engine crank acts as a live load test. If voltage stays above 10.0V while cranking, the battery has enough power for daily starts.