The Physics of Radiator Caps: Why 15 PSI Keeps Your Coolant from Boiling

Radiator cap pressure raises the boiling point of your coolant by roughly 3°F for every 1 PSI it holds. A 15 PSI cap pushes plain water from 212°F to about 257°F, and a 50/50 glycol mix to roughly 263°F. That margin is what keeps coolant liquid against 500°F cylinder head metal.
Most people look at a radiator cap and see a chrome lid. What you are actually holding is a two-way, spring-loaded pressure regulator with three separate sealing surfaces, and it is the cheapest part in the cooling system with the power to warp a cylinder head.
How Radiator Cap Pressure Raises the Boiling Point of Coolant
Pressure raises boiling point because boiling only happens when a liquid’s vapor pressure beats the pressure sitting on top of it. Add 1 PSI to a sealed cooling system and water needs about 3 more degrees of heat before it can flash to steam. Add 15 PSI and you have bought yourself 45°F.
You already know this from the other direction. Water boils at 212°F at sea level under 14.7 PSI of atmosphere. Take that same pot to Denver, where the air is thinner, and it boils several degrees cooler. Cooking times go up. Nothing changed about the water. The only thing that changed was how hard the air was pressing down on it.
An engine does the opposite on purpose. Seal the system, let the coolant expand as it heats, and the cap traps that expansion until the spring gives. Now run the numbers:
| Coolant | Boiling point at 14.7 PSI | Boiling point under a 15 PSI cap |
|---|---|---|
| Pure water | 212°F (100°C) | 257°F |
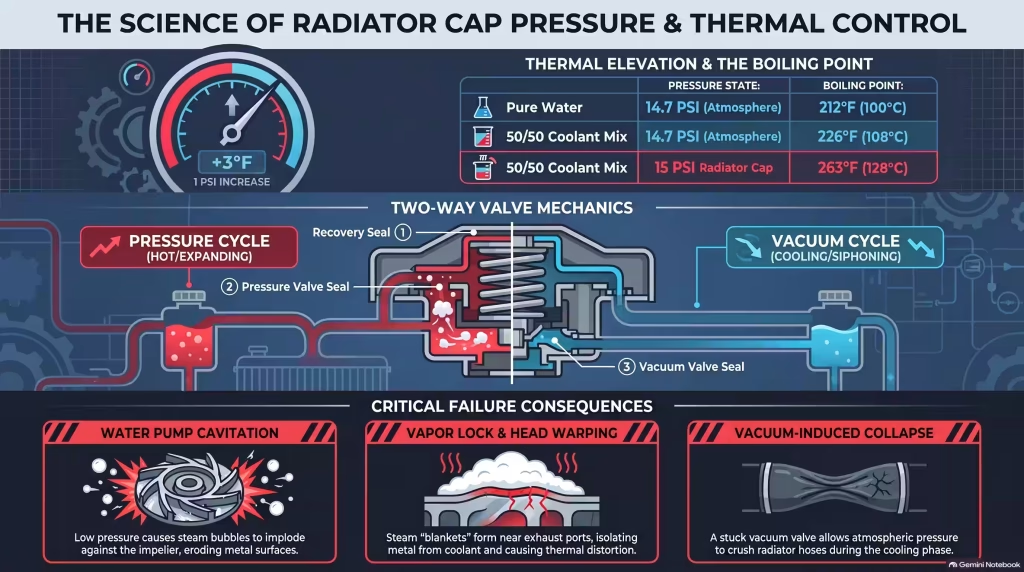
| 50/50 water and ethylene glycol | 226°F (108°C) | 263°F to 266°F (128°C to 130°C) |
Notice what the glycol does on its own. Straight out of the jug, mixed 50/50, it moves the atmospheric boiling point from 212°F to 226°F. Then the cap stacks 15 PSI on top of that and you land somewhere around 263°F. A modern engine that idles at 220°F in traffic has roughly 40 degrees of headroom. Pull the cap off and that headroom vanishes instantly.
That is the whole reason a sealed system exists. Not efficiency, not emissions. Headroom.
How a Radiator Cap Works: Pressure Valve Out, Vacuum Valve In
A radiator cap works as a two-way valve that vents expanding coolant into the recovery tank on the way up and pulls it back into the radiator on the way down. Two separate valves, two separate jobs, two opposite directions of flow. Miss either one and something in the system gets damaged.
The pressure cycle. Coolant heats, expands, and has nowhere to go. Pressure climbs inside the radiator until it reaches the cap’s rating, at which point the big spring-loaded pressure valve lifts off its seat in the filler neck and lets the surplus bleed into the overflow bottle. The system now sits at its rated pressure, held there, boiling point elevated, for as long as the engine is hot.
The vacuum cycle. Shut the engine off and the reverse happens. Coolant cools, contracts, and the volume it used to occupy becomes a partial vacuum. Once internal pressure drops below the 14.7 PSI pressing in from outside, a small central vacuum valve unseats and siphons that stored coolant back out of the reservoir.
Skip that second step and atmospheric pressure does what atmospheric pressure does to a sealed can. Upper hoses go flat. Radiator end tanks pull inward. Plastic tanks on late-model radiators crack at the seam, and no amount of epoxy patching brings a deformed end tank back into spec. A hose that looks sucked flat in the morning is not a hose problem. It is a stuck vacuum valve wearing a hose costume.
The Three Sealing Surfaces Inside a Recovery-Style Cap
A recovery-system cap has three sealing surfaces, and all three have to hold for the system to work:
- The coolant recovery seal. Sits at the very top of the filler neck and keeps steam and fluid from escaping to the ground. This is the seal that decides whether your expanded coolant reaches the overflow bottle or your driveway.
- The pressure valve seal. The large spring-loaded seal pressed against the lower seat in the filler neck. This is the one that sets the rating. Factory caps hold 13 to 17 PSI (0.9 to 1.17 BAR). Aftermarket performance caps go from 19 all the way to 32 PSI.
- The vacuum valve seal. The small center valve that opens when system pressure falls below 14.7 PSI and pulls coolant back from the non-pressurized reservoir.
Three seals, one part, twenty dollars. A hand pressure tester finds the bad one in about two minutes, and it tells you which seal quit. Pressure that bleeds down slowly points at the main pressure valve. A cap that will not build pressure at all usually has a hardened top recovery seal. A hose that collapses overnight points at the vacuum valve.
Why Atmospheric Caps Cause Problems on Custom and Vintage Builds
An atmospheric cap will not build system pressure until the engine is already quite hot, and on a modified engine that delay is where the trouble starts. The difference between the two cap styles lives entirely in the vacuum valve, which is why so many builders grab the wrong one off the parts wall.
Constant pressure caps use a spring-loaded vacuum valve that seals immediately. The moment coolant starts expanding, the system starts building pressure. Boiling point elevation is active from the first few minutes of warmup.
Atmospheric pressure caps use a weighted vacuum valve with no spring behind it. It does not seal until heat and expansion push it closed, so the system runs unpressurized through the entire warmup phase and into the early part of the drive.
On a stock engine in a mild climate, most owners never notice. On a 496 stroker with aluminum heads and a big cam sitting in a Phoenix parking lot, they notice. Running unpressurized during warmup lets localized boiling start early, and the resulting coolant loss and gelling gets blamed on the radiator, the thermostat, the water pump, and eventually the head gasket. It was the cap.
Swapping to a constant pressure cap is a twenty dollar fix for a problem people spend a weekend chasing.
How Cooling System Pressure Prevents Water Pump Cavitation
Pressure protects the water pump impeller from destroying itself, which is the part of this most people have never heard. Boiling point elevation is not only about keeping coolant in the bottle. It is about what happens on the suction side of the pump.
Here is the mechanism. The inlet side of a water pump is a low pressure zone by design. If overall system pressure is already marginal, coolant on that suction side can dip below its local boiling point and flash into vapor. Tiny bubbles form. They get carried into the impeller housing, hit the high pressure discharge side, and collapse.
Collapse is not gentle. Bubble implosion generates localized spikes reported as high as 60,000 PSI, focused on an area smaller than a pinhead, repeated thousands of times per second. Aluminum does not survive that. Pull a cavitated impeller and it looks like something chewed it, with pitted vanes and eroded edges that no longer move coolant efficiently.
So you get a feedback loop. Weak cap lets pressure drop. Low pressure causes cavitation. Cavitation eats the impeller. A damaged impeller moves less coolant. Less flow means hotter coolant and even more boiling. Owners replace the pump, install the same tired cap, and wonder why the new one fails in eighteen months.
Nucleate Boiling: Why Losing Pressure Warps Cylinder Heads
Nucleate boiling is normal and controlled inside a pressurized engine, and it turns destructive the second pressure drops. Cylinder head metal near the exhaust ports routinely exceeds 500°F (260°C), which is far above any coolant boiling point you can engineer. Coolant touching that metal flashes into microscopic steam bubbles no matter what the cap is rated for.
In a healthy system, those bubbles are swept off the surface by turbulent flow within milliseconds, carried into the cooler middle of the coolant stream, and collapsed back into liquid. Heat transfer is actually excellent during this process because each bubble carries away a slug of energy as it forms.
Lose pressure and the bubbles stop collapsing. They merge. What was a nucleate boiling zone becomes a steam blanket sitting on the hottest part of the head, and steam is a spectacular insulator. The metal underneath that blanket is now thermally isolated from the coolant surrounding it. Local temperatures climb fast, the head distorts around the exhaust seat, and combustion chamber temperatures rise high enough to trigger detonation, which brings its own set of problems that owners often mistake for a fuel octane issue.
The gauge does not warn you about any of this. A coolant temperature sensor reads the fluid, not the dry spot on the head. By the time the needle climbs, the damage under the steam blanket has already been happening for a while.
How to Pick the Right Radiator Cap Pressure Rating
Match the pressure rating stamped on your original cap unless you have specifically upgraded the hardware to handle more. Factory ratings sit between 13 and 17 PSI for a reason. Every component in the loop was validated to that number.
Higher is not automatically better. A 24 PSI cap on a fifty-year-old brass radiator with soft original hoses does not give you a higher boiling point. It gives you a failure somewhere else in the loop, usually at the heater core or a hose clamp, and usually at the least convenient possible moment.
Go higher only when the supporting parts justify it:
- Aluminum radiator with welded tanks rated above the cap pressure
- New reinforced hoses with quality constant-tension clamps
- A heater core you have verified or replaced
- Sustained high load use, meaning track sessions, towing in mountain grades, or a heavily boosted setup
For most street cars, including most weekend cruisers, the stock rating with fresh 50/50 coolant and a cap less than five years old covers everything the engine will ever ask for.
One more thing worth putting in your maintenance rhythm. Rubber seals harden and springs relax on a schedule nobody tracks, the same way nobody tracks the slow decline that eventually takes out a starter. Replace the cap every four to five years, or any time the radiator, thermostat, or pump comes off. It is the cheapest insurance on the engine.
How to Safely Open a Hot Cooling System
Never open a cap on an engine you have not verified is depressurized, and the verification takes five seconds. Squeeze the upper radiator hose with your hand. Firm and unyielding means the system is still pressurized. Soft and easily compressed means pressure has dropped and it is safer to proceed.
Run it in this order:
- Shut the engine off and wait. Thirty minutes minimum, longer on a hot day or after sustained load.
- Squeeze the upper radiator hose. If it is hard, stop and wait longer.
- Once the hose gives easily, drape a thick shop towel over the cap.
- Turn to the first detent only and pause. Let any remaining pressure vent past the seal.
- Only after the hissing stops, press down and turn the cap the rest of the way off.
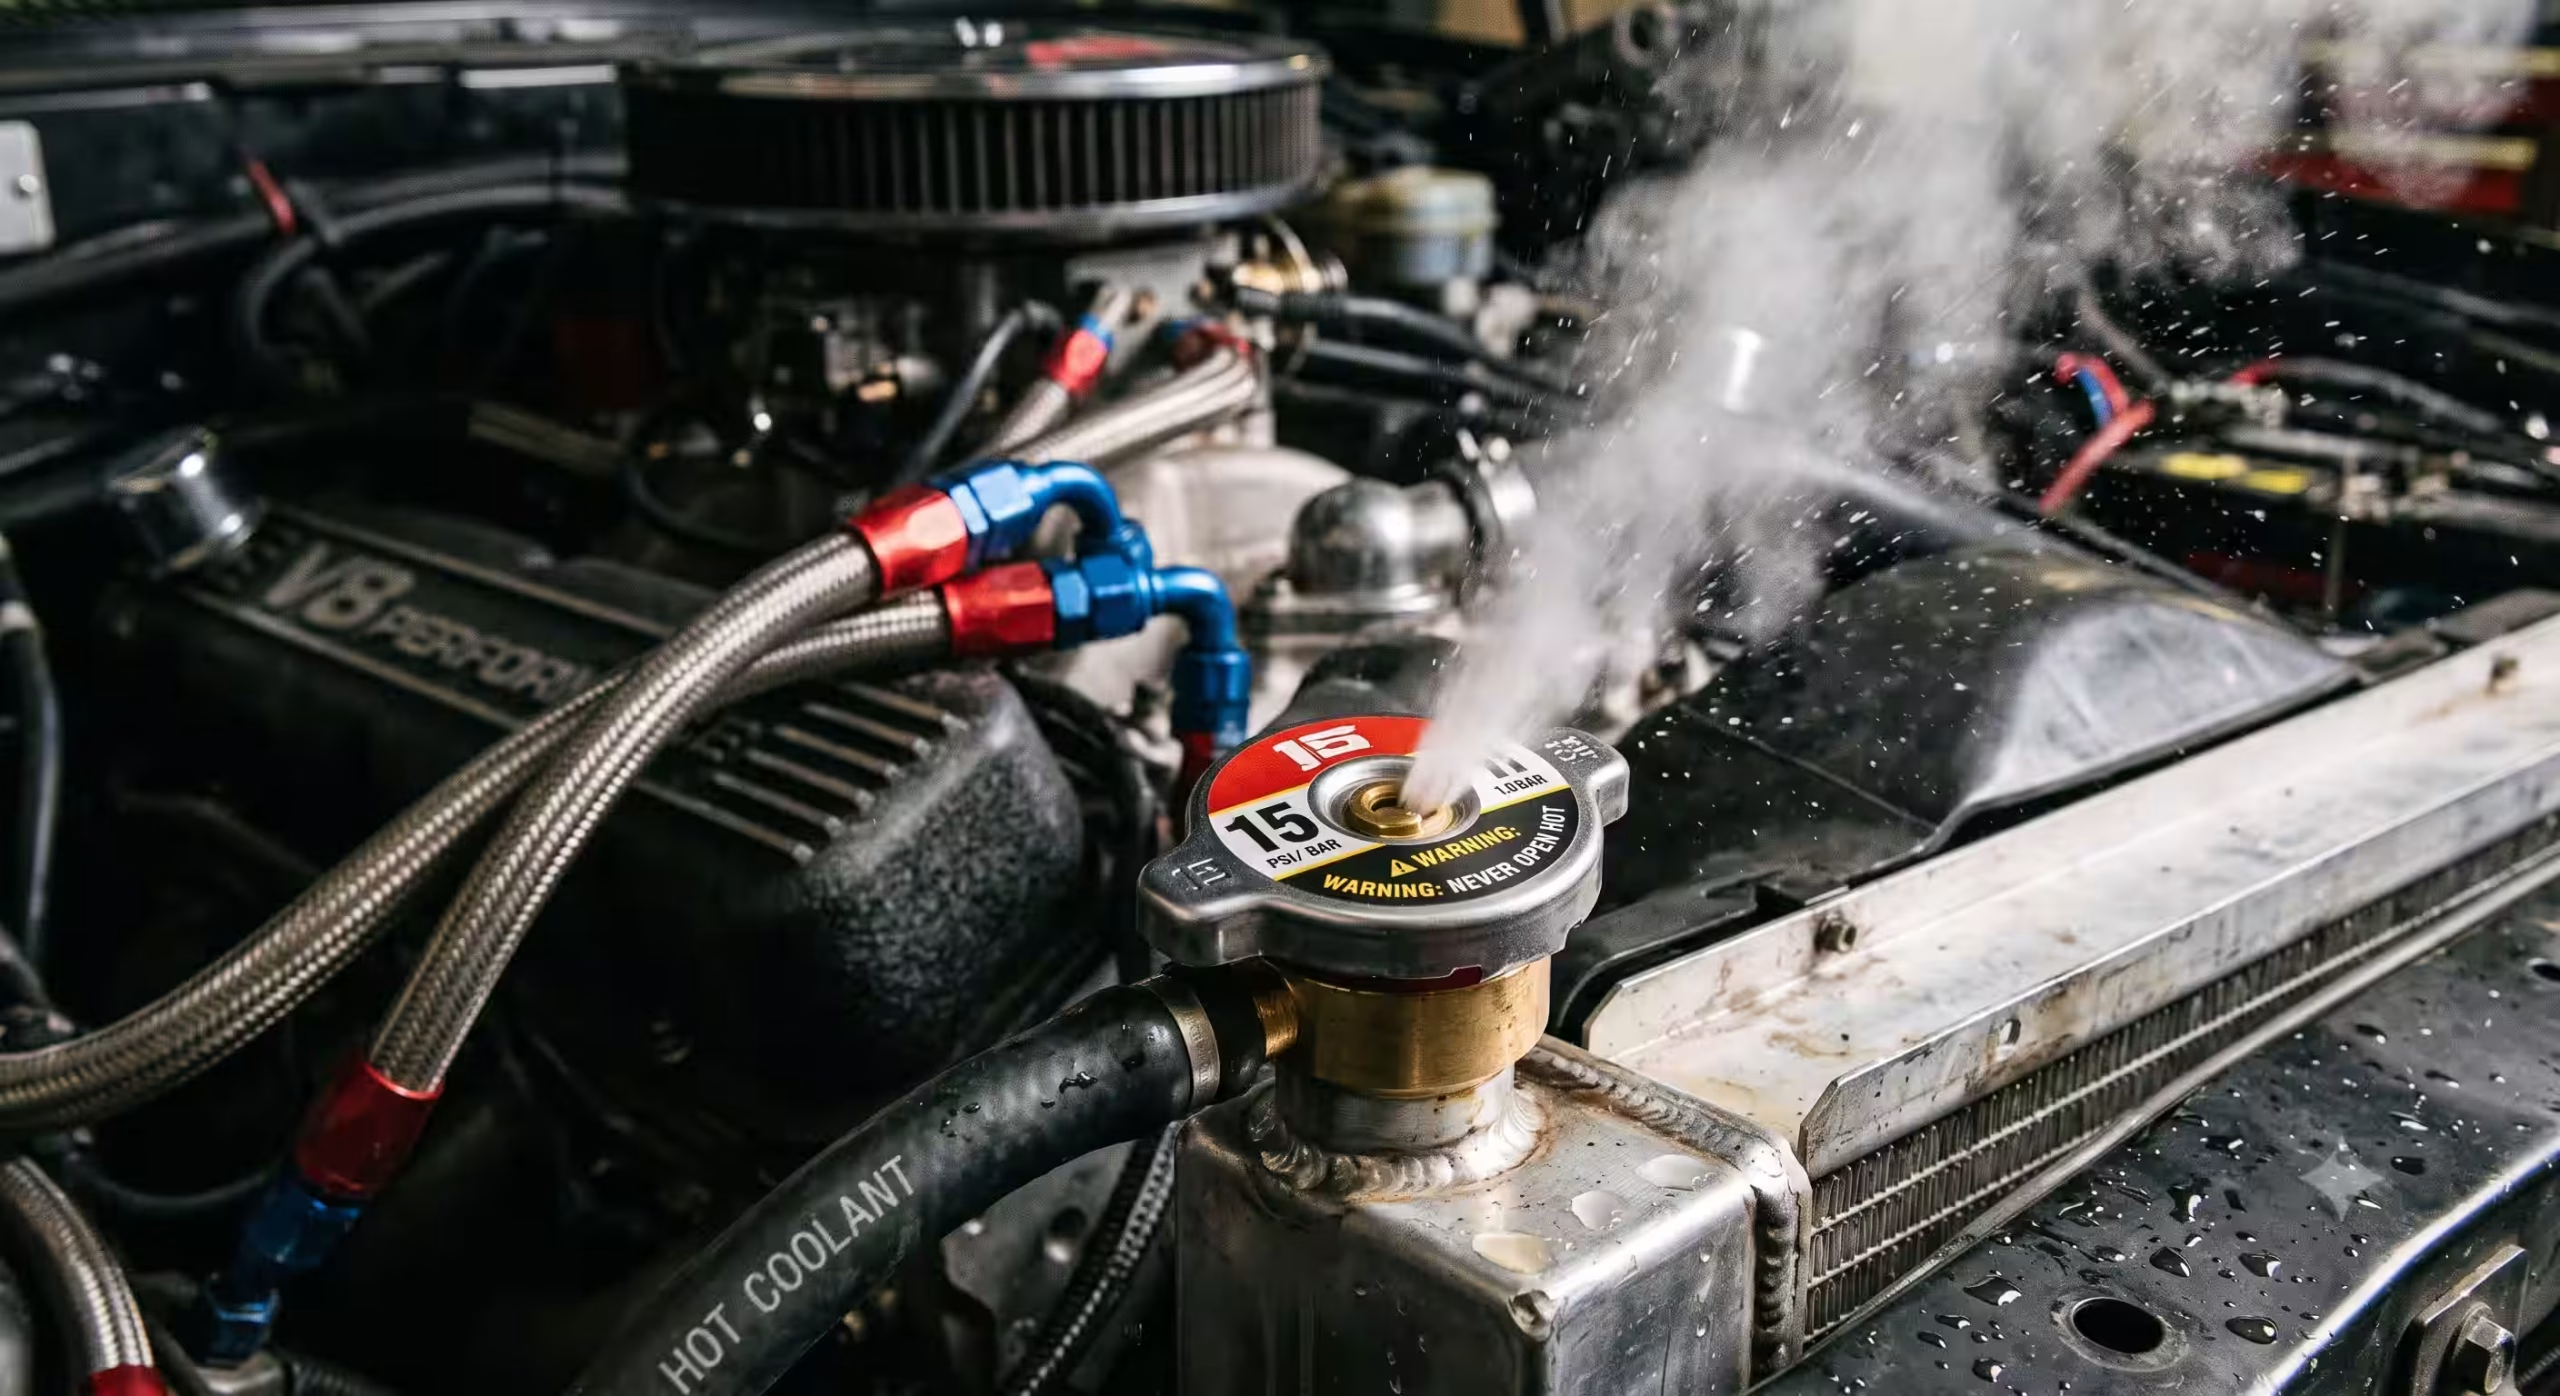
The number to respect is 240°F. If an engine has reached 240°F (116°C) and you remove the cap, system pressure drops to atmospheric 14.7 PSI instantly. The coolant is now sitting far above its unpressurized boiling point with nothing holding it back, so it flashes to steam and erupts out of the filler neck. That is not a spill. That is scalding coolant and steam at face height, and burn units see this injury every summer.
Check the overflow bottle instead. It is unpressurized, it tells you the coolant level, and it has never sent anybody to the emergency room.
Frequently Asked Questions
What PSI radiator cap do I need?
Match the pressure rating stamped on your factory cap, usually 13 to 17 PSI. Going higher only helps if the radiator, hoses, heater core, and gaskets can hold it. Old brass radiators and soft hoses often cannot.
Can I use a higher pressure radiator cap than stock?
Yes, but only on a system built for it. Aftermarket caps run 19 to 32 PSI and raise the boiling point further, though that same pressure pushes on every seal, hose clamp, and radiator seam in the loop.
How do I know if my radiator cap is bad?
A bad cap shows up as coolant loss with no visible leak, an overflow tank boiling over, or a hose that stays soft when the engine is hot. A shop pressure tester confirms it in about two minutes.
Why does my upper radiator hose collapse when the engine cools?
A collapsing hose means the vacuum valve in the cap is stuck shut. As coolant cools and contracts, atmospheric pressure crushes the hose because fluid cannot flow back from the recovery tank. Replace the cap before the radiator tank deforms.
Does a higher pressure cap make the engine run cooler?
No, a higher rated cap does not lower coolant temperature. It raises the temperature at which coolant flashes to steam, which keeps liquid against hot metal and preserves heat transfer. Cooling capacity still comes from the radiator, fan, and airflow.
How often should a radiator cap be replaced?
Replace the cap every four to five years, or any time you replace the radiator, thermostat, or water pump. The rubber seals harden and the spring loses tension long before the cap looks worn from the outside.