How to Check Tire Pressure: 3 Methods That Actually Work

You can check tire pressure in under 2 minutes using your TPMS dashboard, a tire pressure gauge, or a gas station air pump. Most drivers skip this check until the warning light comes on. By that point, their tires are already well below safe operating pressure. Underinflated tires increase your blowout risk, wear down your tread unevenly, and quietly drain your fuel economy every time you drive. This guide walks you through all three methods, tells you exactly what PSI your tires need, and explains how often you should actually be checking.

For a full breakdown of tire health beyond pressure checks, see our complete car tires guide.
🔑 Key Takeaways
- The correct PSI for your car is printed on the driver’s door jamb sticker. The tire sidewall, which shows the maximum pressure only.
- U.S. federal law requires TPMS on all vehicles manufactured after September 2007 (NHTSA FMVSS 138), but the light only activates when pressure drops 25% below recommended.
- Tire pressure drops 1–2 PSI for every 10°F decrease in temperature, making monthly checks and winter checks especially important.
- Tires running 5 PSI below recommended reduce fuel economy by 2–3%, according to the U.S. Department of Energy.
Method 1: Check Your TPMS Dashboard (Fastest for Modern Cars)
The Tire Pressure Monitoring System (TPMS) is the quickest check available on most cars built in 2008 or later. Under NHTSA Federal Motor Vehicle Safety Standard 138, all passenger vehicles manufactured after September 2007 must include TPMS as standard equipment. When the dashboard warning light turns on, pressure in one or more tires has already fallen 25% or more below the manufacturer’s recommended level.
That 25% threshold is the legal activation floor, which means your tires can lose significant pressure before the system alerts you. TPMS is a safety net, not a precision monitor.
How to Read Your TPMS Light
- Solid TPMS light: One or more tires are significantly underinflated. Pull over safely and check pressure as soon as possible.
- Flashing TPMS light (60–90 seconds, then solid): This signals a sensor fault, not a pressure problem. The TPMS sensor itself needs inspection or replacement.
When your TPMS light comes on, don’t simply add air and drive away. Check all four tires individually with a gauge to find which one triggered the alert and how far off each tire is from its target PSI.
U.S. law requires TPMS on all vehicles manufactured after September 2007 (NHTSA FMVSS 138). The system activates when tire pressure falls 25% below the manufacturer’s recommended level. TPMS confirms a pressure problem exists but does not display exact PSI per tire and a manual gauge check is still required for accurate readings.
TPMS limitation: The system tells you a problem exists. It does not show you the exact PSI in each individual tire. For that, you need a gauge: which is why Method 2 is the most accurate option.
Method 2: Use a Tire Pressure Gauge (Most Accurate)
A tire pressure gauge gives you the exact PSI reading for each tire: something your TPMS dashboard can’t do. Gauges are inexpensive (under $15 for a reliable digital model), fit in a glove box, and take less than 3 minutes to use across all four tires. This is the method mechanics use and the one that gives you complete control.
Step 1: Check When Your Tires Are Cold
Always check tire pressure before driving or at least 3 hours after parking. Driving heats the air inside your tires, which raises pressure temporarily: giving you a falsely high reading. The correct baseline is cold tire pressure, taken when the car has been sitting overnight or for 3 or more hours. This is the same condition under which the PSI recommendation on your door jamb was calculated.
Step 2: Find Your Vehicle’s Recommended PSI
Open the driver’s door and look for the tire information placard: a sticker on the door jamb (the metal frame inside the door). It lists the exact recommended PSI for your front and rear tires. Use that number. Do not use the number molded into the tire sidewall. The sidewall number is the maximum pressure the tire can hold, not the pressure your car was engineered to run on. Running tires at max sidewall pressure is unsafe and gives a harsh, unstable ride.
Step 3: Remove the Valve Cap
Find the valve stem: a short rubber or metal nozzle protruding from the inner rim of each wheel. Twist off the valve cap and set it somewhere you won’t lose it (a pocket works). The valve stem is the access point for both measuring and adjusting tire pressure.
Step 4: Press the Gauge Firmly onto the Valve Stem
Press the gauge head straight onto the valve stem with firm, even pressure. Hold it for 1–2 seconds. A hissing sound usually means the gauge isn’t seated squarely: reposition and press again. A proper seal gives you one clean PSI reading. If you get two different readings back to back, the second one is more reliable (the first may have released air briefly).
Step 5: Read the PSI and Compare
Note the reading and compare it to the recommended PSI from your door jamb sticker. If the reading is more than 1–2 PSI below the target, add air. If it’s more than 2–3 PSI above the target, release some air using the small pin on the back of most gauge heads, or the pin inside the valve stem itself.
Step 6: Add or Release Air, Then Reinstall the Valve Cap
Use an air compressor or a gas station air pump (covered in Method 3) to bring pressure up to target. Add air in short bursts and recheck with your gauge between each burst: it’s easy to overshoot. Once you’ve hit the right PSI reading, screw the valve cap back on finger-tight. The cap keeps dust and debris out of the valve core.
Which Type of Tire Pressure Gauge Should You Use?
There are three main gauge types. A digital gauge is the easiest to read accurately and costs $10–$20. A dial gauge uses an analog needle and is reliable but slightly harder to read in low light. A stick (pencil) gauge is the cheapest option and fits in any pocket, though it requires a bit more practice to read correctly. Any of the three will give you an accurate PSI reading: the digital model is recommended for ease of use.
Method 3: How to Check Tire Pressure Without a Gauge
If you don’t have a gauge on hand, there are rough alternatives: but understand these are emergency options, not reliable substitutes. None of them give you a PSI reading. They can only tell you something is obviously wrong with a tire.
- Visual inspection: Park on flat ground and look at each tire from the front. A noticeably flat or bulging sidewall indicates significant underinflation. Tires can lose 20% of their pressure before looking visibly low.
- Hand/thumb test: Press your thumb firmly into the sidewall. A properly inflated tire should feel firm with almost no give. This is extremely imprecise: don’t rely on it.
- Gas station air pump: Most gas stations have air machines at the pump island. Many of them include a built-in pressure gauge. This is the most reliable “no-gauge-at-home” option and costs nothing or a small fee. You can check tire pressure without gauge equipment at home by driving directly to a station: just remember that the tires will be slightly warm from driving, so readings may run 2–4 PSI higher than cold.
Visual checks and the thumb-press test cannot detect underinflation below 20%: meaning your tires could already be dangerously low without looking flat. The only accurate way to check tire pressure without gauge equipment at home is to use the built-in gauge on a gas station air hose nozzle, which gives a PSI reading you can act on.
What PSI Should Your Tires Be?
The correct tire pressure for your car is printed on the driver’s door jamb sticker: not on the tire itself. The PSI embossed into the tire sidewall is the maximum inflation pressure for that tire casing, not the recommended operating pressure for your vehicle. Running at max sidewall pressure gives a harsher ride and can actually reduce traction. Your door jamb number accounts for your car’s weight, suspension, and load distribution.
As a general reference, typical recommended PSI ranges by vehicle type are:
| Vehicle Type | Recommended PSI Range | Where to Confirm |
|---|---|---|
| Passenger cars | 30–35 PSI | Door jamb sticker |
| SUVs and crossovers | 32–36 PSI | Door jamb sticker |
| Trucks and large SUVs | 35–45 PSI | Door jamb sticker or owner’s manual |
Note that front and rear tires on the same car sometimes have different recommended pressures. The placard lists both. Also check the spare tire occasionally: a flat spare is useless in a roadside emergency.
If you can’t find the door jamb sticker, the owner’s manual lists the same PSI information in the tire and wheel specifications section.
How Often Should You Check Tire Pressure?
Check tire pressure once a month and always before a long road trip. Tires naturally lose 1–2 PSI per month even without any puncture or damage: that’s just normal permeation through the rubber. Monthly checks catch gradual loss before it reaches the TPMS activation threshold.
Temperature is the other major factor. Tire pressure drops 1–2 PSI for every 10°F decrease in temperature, according to the U.S. Tire Manufacturers Association. A car sitting at 32 PSI on a 70°F day can be down to 28–30 PSI on a 40°F morning, which is already a meaningful drop toward TPMS territory. This is why autumn and early winter are the most common seasons for TPMS lights to appear: the temperature dropped overnight, and so did the pressure.
Tire pressure drops 1–2 PSI for every 10°F decrease in ambient temperature (U.S. Tire Manufacturers Association). A car with tires at 32 PSI on a 70°F day can see pressure fall to 28–30 PSI when temperatures drop to 40°F overnight: enough to trigger a TPMS warning without any puncture or damage occurring.
Recommended check schedule:
- Monthly: Quick check with your gauge before the first drive of the day
- Before road trips: Check all four tires cold, including the spare
- Seasonal transition: Check whenever temperatures shift by more than 20°F from the last time you checked
- After hitting a pothole or curb: Impact can knock pressure down or damage the valve stem seal
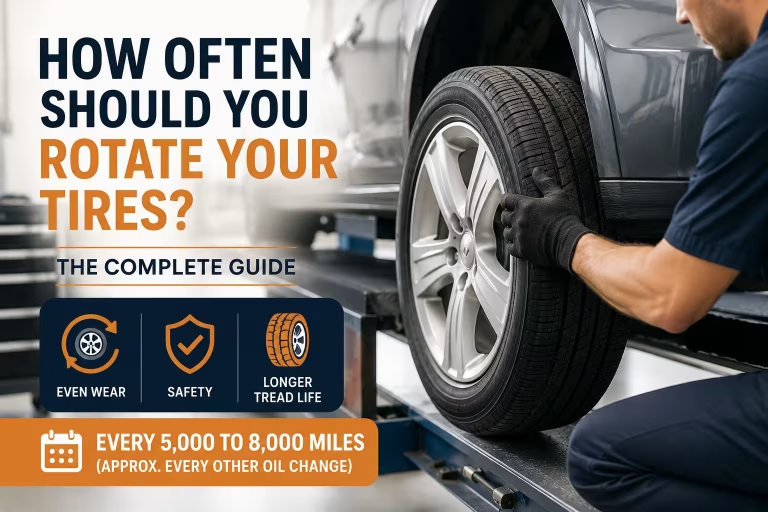
Knowing how often to rotate tires is equally important for even wear: see our guide on how often to rotate tires for the full rotation schedule and what happens when you skip it.
Why Low Tire Pressure Is More Dangerous Than Most Drivers Realize
Underinflated tires aren’t just a fuel economy problem. They’re a structural one. When a tire runs below its recommended PSI, the sidewall flexes excessively with every rotation. That flex generates heat inside the tire casing. Heat buildup weakens the rubber compounds and internal cords over time: and in extreme cases, causes a sudden blowout at highway speed. The risk is compounded by the fact that tires can look normal while significantly underinflated.
Beyond blowout risk, underinflation also increases your stopping distance. A tire at 25% below recommended pressure can extend braking distance by up to 7%, according to the National Highway Traffic Safety Administration: meaningful in an emergency stop situation.
Tire tread wear is also affected. Underinflated tires wear faster on the outer edges (shoulder wear pattern), shortening tire life and potentially voiding treadwear warranties.
The fuel economy hit is real too. The U.S. Department of Energy reports that tires running 5 PSI below recommended reduce fuel economy by approximately 2–3%. Across a year of driving, that’s measurable money left at the pump. When tires are underinflated, rolling resistance increases: the tire deforms more with each rotation, requiring more energy to maintain speed.
Overinflated tires create their own problems: reduced contact patch with the road, uneven center-tread wear, and a harsher ride. The door jamb target PSI is engineered to balance all of these factors.
Frequently Asked Questions
How do I know if my tires need air?
The clearest signs of underinflated tires are a TPMS warning light on your dashboard, visible sidewall bulge or flatness, and poor vehicle handling (pulling to one side, sluggish steering response). However, tires can lose 20% of their pressure before looking visibly flat, so visual inspection alone isn’t reliable. Check monthly with a gauge and compare the PSI reading to your door jamb sticker for accurate results.
Can I check tire pressure without a gauge?
Yes, but only roughly. The visual inspection method and hand-press test can spot severely flat tires, but they can’t detect gradual pressure loss. The most practical no-gauge option is a gas station air pump: most have a built-in pressure gauge on the air hose nozzle that gives a real PSI reading. For a precise check, a digital tire pressure gauge costs under $15 and pays for itself in improved tire life and fuel savings.
Does tire pressure affect fuel economy?
Yes, significantly. The U.S. Department of Energy estimates that tires 5 PSI below recommended reduce fuel economy by 2–3%. The reason is rolling resistance: an underinflated tire flattens more against the road surface with each rotation, which increases the energy needed to keep the car moving at speed. Keeping tires at the correct PSI reading is one of the easiest and cheapest ways to improve miles per gallon.
The Bottom Line
Checking tire pressure takes less time than it takes to fuel up your car. Use your TPMS dashboard as an early warning system, keep a digital gauge in your glove box for monthly checks, and always refer to your door jamb sticker. The tire sidewall: for the correct PSI target. Check monthly, check before road trips, and check whenever temperatures drop sharply.
Tire pressure is one of the simplest maintenance tasks there is. The consequences of ignoring it: blowouts, uneven wear, extra fuel costs: are far more expensive than a 3-minute monthly check.
When your tires are in good shape, the next thing to stay on top of is tread wear. Learn exactly when to replace your tires before they become a safety issue.