How to Fix Scratches on Luxury Vinyl Flooring
Luxury Vinyl Plank (LVP) flooring is celebrated for its durability, but seeing that first ugly scratch can be disheartening. Whether it’s from a dragged chair or a dropped object, a scratch can spoil the look of your beautiful floors.
The good news? Most scratches on luxury vinyl are surprisingly easy to fix yourself without calling a professional. This guide will provide clear, step-by-step instructions to repair everything from minor scuffs to deeper scratches, using the right method for each type of damage.
First, Clean and Assess the Damage
Before any repair, you must start with a clean surface. This ensures you can see the scratch clearly and that the repair materials will adhere properly.
-
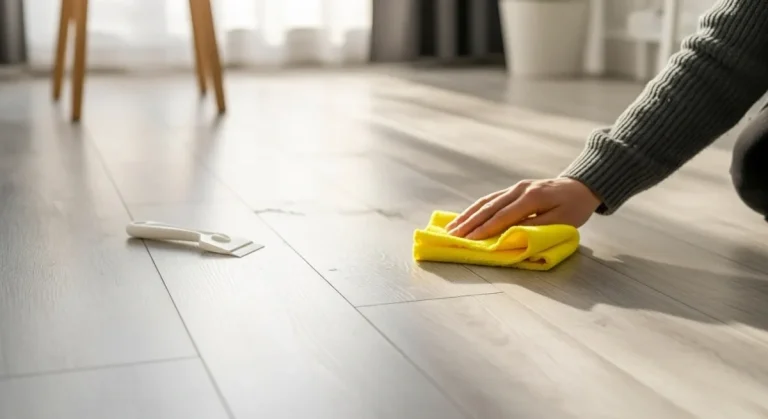
Clean the Area
Use a pH-neutral floor cleaner and a soft microfiber cloth to thoroughly clean the scratch and the surrounding plank. Avoid harsh chemicals. Dry the area completely.
-
Perform the Fingernail Test
Run your fingernail gently over the mark. If it glides right over, it’s a surface scuff. If your nail catches slightly, it’s a light scratch. If it catches significantly, it’s a deep scratch or gouge. The depth determines the repair method.
Find Your Repair Method
| Type of Damage | Best Method | Tools Needed | Difficulty |
|---|---|---|---|
| Surface Scuff | Gentle Buffing | Microfiber cloth, tennis ball | Easy |
| Light Scratch | Scratch Repair Kit | LVF repair kit, putty knife | Easy |
| Deep Scratch | Wax/Putty Filler | Filler kit, heat gun (optional) | Medium |
| Gouge / Tear | Plank Replacement | Utility knife, new plank, adhesive | Difficult |
Method 1: Fixing Light Scuffs
Best for marks from shoes or furniture that haven’t broken the floor’s protective wear layer.
- Buff with a Cloth: Start by buffing the mark vigorously with a clean, dry microfiber cloth. Often, this simple friction is enough to remove the scuff.
- Use a Tennis Ball: If the cloth doesn’t work, gently rub the scuff mark with a standard tennis ball. The soft felt acts like an eraser on the floor’s surface.
- Try a Touch of Oil: For stubborn scuffs, apply a tiny amount of jojoba oil or WD-40 to a cloth and buff the area. Be sure to clean the spot with a pH-neutral cleaner afterward to remove any oily residue.
Method 2: Repairing Minor Scratches
Best for fine scratches you can feel with a fingernail but that aren’t very deep.
- Get an LVP Scratch Repair Kit: These kits are the best solution as they contain products specifically designed for your floor’s finish.
- Apply the Concealer: Apply a very small amount of the repair solution directly into the scratch.
- Buff Away the Excess: Use the applicator pad included in the kit to gently buff the area, blending the solution. Let it dry completely as per the kit’s instructions.
Method 3: Filling Deep Scratches & Gouges
Best for deeper grooves that have gone through the wear layer and into the vinyl itself.
- Choose a Color-Matched Filler: Use a wax or putty filler kit designed for vinyl floors. It’s crucial to select a color that closely matches your flooring.
- Apply the Filler: Use a putty knife to press the filler firmly into the gouge. Slightly overfill it to ensure the scratch is completely filled.
- Scrape the Excess: Once the filler has set for a few minutes, use the clean edge of the putty knife to scrape away the excess material, making it perfectly level with the floor.
- Sand if Necessary: After the filler has fully cured, you can lightly sand with very fine-grit sandpaper (220-grit or higher) to ensure the surface is perfectly smooth.
- Seal the Repair (Recommended): For added durability, apply a very thin layer of polyurethane sealant over the dried filler. This protects the repair and helps it blend with the floor’s sheen.
What NOT to Do: Common Mistakes
Avoid Causing More Damage
- Abrasive Cleaners: Never use abrasive cleaners or scouring pads like steel wool. They will permanently dull and scratch the finish.
- Harsh Solvents: Do not use acetone, nail polish remover, or other harsh solvents. They can melt or discolor the vinyl.
- Wood Floor Products: Avoid using wood floor polish or wax. It won’t adhere properly to vinyl and will create a sticky, slippery mess.
- Excessive Heat: High temperatures from a heat gun can warp or melt vinyl. Use with extreme caution and keep it moving.
Prevention: The Best Way to Handle Scratches
Use felt pads on the legs of all furniture, especially chairs and tables that move often.
Place high-quality doormats at all entrances to trap dirt and grit from shoes.
Clean regularly with a soft-bristle broom or a vacuum without a beater bar.
Keep pet nails trimmed regularly to prevent deep scratches from claws.
Key Takeaways
Always match the repair method to the severity of the scratch for the best results.
Never use abrasive cleaners or harsh solvents like acetone, as they can permanently damage the floor.
An ounce of prevention (like felt pads and doormats) is worth a pound of cure.
Frequently Asked Questions
It is not recommended. A Magic Eraser is a micro-abrasive and can dull the finish of your LVP floor, making the area more noticeable. If you must try it, test in a hidden spot first, like inside a closet.
No. Scratches on vinyl flooring do not heal or fade over time. In fact, they can collect dirt, which often makes them stand out more if they are not repaired.
When done properly, repairs can last for years. Light scratch repairs often last 3-5 years, while deeper repairs with wax fillers may need touch-ups every 2-3 years in high-traffic areas.
It is strongly advised against. Automotive products are formulated for different materials and may contain chemicals that could discolor or damage your flooring, potentially voiding your warranty.
For severe damage like a very deep gouge, a tear, or a peeling corner, the best long-term solution is to replace the entire plank. This is a more involved DIY project but ensures a seamless, durable result.
Restore Your Floor’s Beauty
Repairing scratches on luxury vinyl flooring is very manageable when you match the right method to the severity of the scratch. From a simple buff to a filler kit, you can restore the beauty of your floors with a little time and DIY effort, keeping them looking great for years to come.