Hallway Ceiling Light Spacing & Flush Mount Sizing Guide
Reader Disclosure: This post contains affiliate links. If you buy through them, we may earn a commission at no extra cost to you. We only recommend items tested for clean craftsmanship and authentic durability.
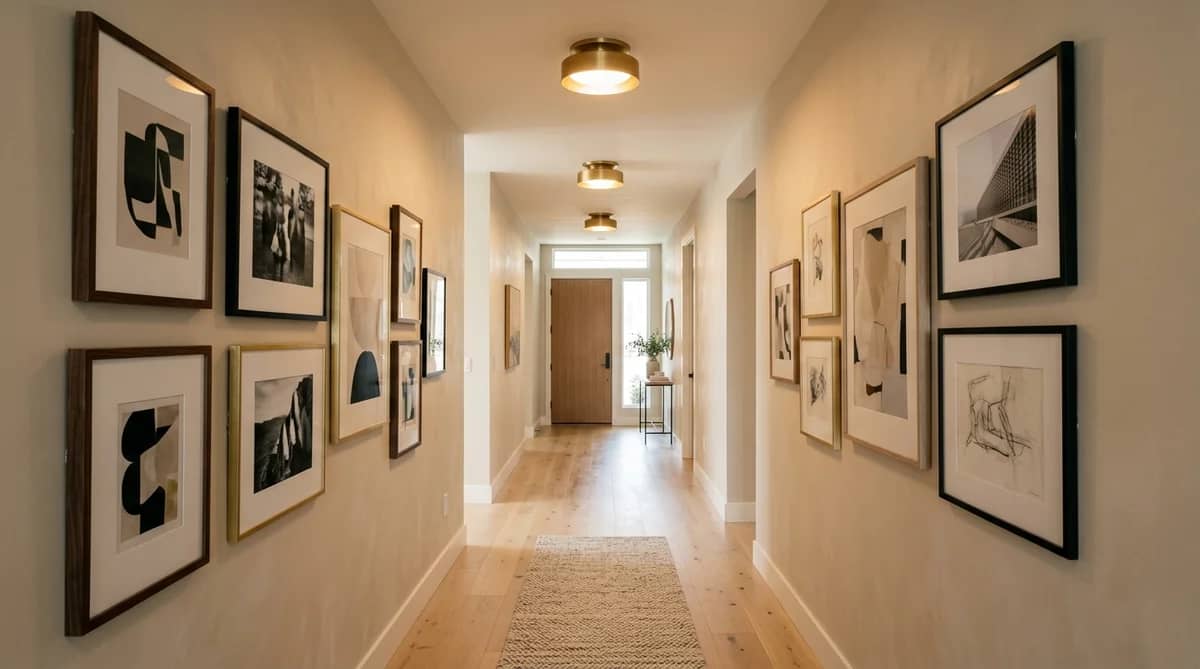
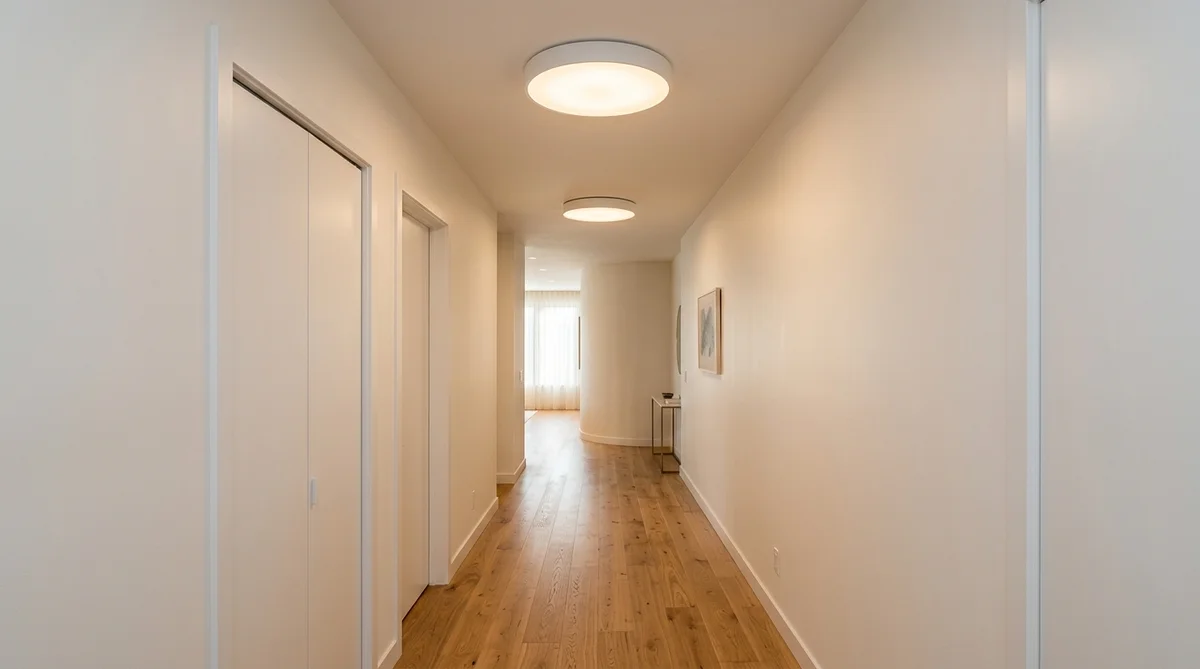
Space hallway flush mount lights eight to ten feet apart along the ceiling centerline. Position your first and last fixtures four to five feet from the hallway end walls. In standard eight-foot ceilings, select fixtures measuring ten to twelve inches in diameter with a drop under six inches. This layout delivers continuous, shadow-free illumination while preserving eighty-four inches of clear walking headroom.
Most homeowners make two common mistakes when planning corridor lighting. They space fixtures twelve to fifteen feet apart to cut electrical costs. This creates dark shadow pockets between dim light pools, making long hallways feel like gloomy tunnels. Other renovators hang oversized semi-flush fixtures with ten-inch drops on standard eight-foot ceilings. Tall guests bump their heads, and carrying mattresses or tall furniture upstairs becomes a nightmare.
Before cutting drywall or running junction boxes, calculate your hallway footprint with our Room Lumens Calculator to verify fixture counts, total lumen targets, and switch locations for your floor plan.
The 8-to-10 Foot Hallway Light Spacing Formula
Divide your total hallway length by eight to ten feet to determine the exact number of ceiling lights you need. A twenty-foot corridor requires two to three fixtures. An eight-foot spacing interval creates overlapping sixty-degree light cones on the floor. This overlap erases dark voids between doorways and lights wall art evenly from end to end.
A contractor on Reddit’s r/HomeImprovement shared a classic layout correction. The homeowner had two builder-grade dome lights spaced fourteen feet apart in a twenty-eight-foot hallway. Walking the corridor felt like moving through dim headlights in fog. Adding two extra junction boxes at nine-foot intervals transformed the corridor into an inviting, gallery-quality gallery walk. The renovation required only minor drywall patching and basic wire pulling.
Centering Fixtures Along the Hallway Width
Always align your light fixtures along the true architectural centerline of the ceiling. Measure the distance between opposite baseboards at three points along the hall. Snap a chalk line down the exact center. Cutting junction boxes off-center makes the corridor look crooked, especially when visitors look down the hall from open living spaces.
If your hallway includes built-in linen cabinets or full-height bookshelves, adjust your centerline. Measure from the front face of the cabinetry to the opposite wall. Center the fixtures within the usable walking corridor. This adjustment directs light onto the open floor rather than beaming directly onto top cabinet crown molding.
End Wall Setback Rules
Position your outer fixtures four to five feet from the hallway end walls or doorways. Placing a light directly against an end wall creates a harsh vertical hot spot on the door trim. It also starves the middle of the hallway of light.
The four-to-five-foot setback allows the light cone to spread naturally before reaching the corner. Arriving guests step into a brightly lit threshold without walking into direct fixture glare. Maintain this half-spacing interval at both ends of the corridor.
Flush Mount Sizing and Proportions for Narrow Ceilings
Calculate your fixture diameter by adding the hallway width and length in feet, then converting that sum to inches. In narrow residential hallways measuring three to four feet wide, cap fixture diameter at ten to twelve inches. An oversized fourteen-inch fixture overwhelms a narrow ceiling and makes a thirty-six-inch hallway feel constricted.
Select clean, low-profile fixtures for ceilings under nine feet. A tight flush mount hugs within three to five inches of the drywall. It delivers broad ambient light while keeping ceiling lines clean and uncluttered. Low-profile discs and drum fixtures work exceptionally well in modern and transitional homes.
Flush Mount Versus Semi-Flush Mount Clearance
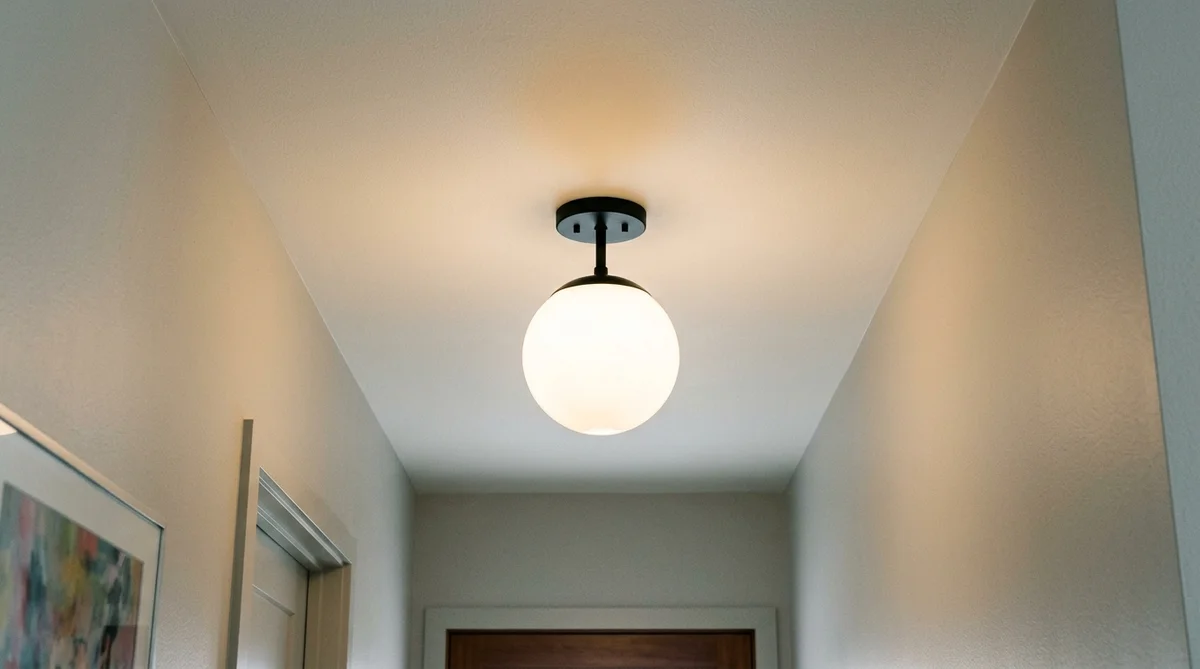
Building codes and safety standards require eighty-four inches of clear walking headroom beneath any ceiling fixture. In an eight-foot (ninety-six-inch) ceiling, you have twelve inches of total vertical allowance. A true flush mount drops three to six inches, leaving ninety to ninety-three inches of safe clearance.
Semi-flush fixtures feature a short stem that drops the light globe four to eight inches below the ceiling canopy. Reserve semi-flush fixtures for nine-foot and ten-foot ceilings. On a nine-foot ceiling, a semi-flush fixture dropping ten inches still leaves ninety-eight inches of clearance. It also casts gentle uplight across the ceiling drywall, visually expanding the hallway height.
Scale Rules for Wider Five-Foot Corridors
Wider corridors in custom homes measure five to six feet across. Small ten-inch lights look lost and undersized on these broader ceilings. Step up to twelve-to-fourteen-inch drum fixtures or square flush panels.
Larger fixtures carry enough visual weight to anchor a wider hallway. They also house dual or triple light sockets, providing the higher lumen output needed to illuminate wider floor areas safely. Pair these larger fixtures with frosted opal glass shades to diffuse light softly across the walls.
Lumen Requirements and Color Temperature Guidelines
Hallways require ten to twenty foot-candles of illumination at the floor. Plan for forty to sixty lumens per square foot of hallway area. A four-by-twenty-foot hallway covers eighty square feet. Multiply eighty by fifty lumens to establish a four-thousand-lumen target for the entire corridor.
Divide that four-thousand-lumen total evenly across your fixtures. If you install four lights spaced eight feet apart, each fixture should provide roughly one thousand lumens. A one-thousand-lumen output equals a standard 75-watt incandescent bulb or a modern 12-watt LED diode pack.
Why 2700K to 3000K Color Temperature Works Best
Choose 2700K warm white or 3000K soft white LED bulbs for home hallways. A 2700K bulb creates a cozy, welcoming transition between bedrooms and living areas. It flatters wood floors, beige paint, and framed family photographs. A 3000K bulb offers slightly crisper clarity for modern spaces with white walls and gray tile.
Avoid 4000K and 5000K cool daylight bulbs in residential corridors. Cool bulbs produce a sterile hospital ambiance. They cast harsh shadows under wall art and make narrow hallways feel cold and unwelcoming. Keep your color temperature consistent across every fixture in the hallway run to avoid patchy lighting.
Installing Three-Way Switches and Dimmers
Wire all hallway lights to three-way switches at both ends of the corridor. You should never walk down a dark hallway to reach a light switch. For split-level homes or hallways connecting multiple bedrooms, add four-way switches at every major room entrance.
Install an electronic LED dimmer on the main switch leg. Dimmers let you run fixtures at full brightness during morning routines or vacuuming. At night, dim the circuit down to twenty percent to provide gentle guidance for children or guests without waking the household.
Flush Mounts Versus Recessed Wafer Lights in Hallways
Flush mount fixtures provide three hundred sixty degrees of ambient light wash across ceiling and wall planes. Recessed can lights project narrow downward cones that leave upper walls in shadow. In a narrow hallway, recessed cans create a tunnel effect where doorframes and wall molding stay dark.
Frosted glass flush mounts bounce light sideways against gallery frames and baseboards. This lateral light spread makes a three-foot hallway feel wider and more expansive. If you prefer recessed lights, choose wide ninety-degree beam angles and space them closer together at five-to-six-foot intervals to avoid scalloped shadows on drywall.
Smart Motion Sensors and Nightlight Modes
Modern hallway lighting benefits greatly from smart occupancy sensors. Replace standard three-way switches with smart dimmer sensors near hallway entrances. Program the sensors to activate full daytime brightness between six in the morning and nine at night.
After nine at night, automate the fixtures to power on at ten percent brightness. This gentle nightlight setting provides safe footing for midnight trips to the bathroom or kitchen. It completely prevents eye shock from sudden high-lumen bursts in a dark home.
Hallway Lighting Layout Reference Matrix
Review the quick reference table below to match your hallway length, ceiling height, and fixture specifications.
| Hallway Length & Ceiling. | Fixture Count. | Spacing Interval. | Max Fixture Drop. | Lumens per Light. |
|---|---|---|---|---|
| 12 to 16 ft (8 ft ceiling). | 2 flush mounts. | 8.0 feet apart. | 6.0 inches max. | 800 to 1,000 lumens. |
| 18 to 24 ft (8 ft ceiling). | 3 flush mounts. | 8.0 to 9.0 feet apart. | 6.0 inches max. | 800 to 1,000 lumens. |
| 25 to 32 ft (9 ft ceiling). | 3 to 4 semi-flush mounts. | 9.0 to 10.0 feet apart. | 9.0 inches max. | 1,000 to 1,200 lumens. |
| 35 to 45 ft (10 ft ceiling). | 4 to 5 semi-flush mounts. | 9.0 to 10.0 feet apart. | 12.0 inches max. | 1,200 to 1,400 lumens. |
| Short L-Shaped Hallway. | 2 fixtures (1 per leg). | Center of each hallway run. | Match ceiling height. | 800 lumens each. |
Calculate your exact floor area, lumen targets, and circuit loads with our interactive Room Lumens Calculator before ordering electrical supplies.
When selecting low-profile flush mounts, brushed brass finishes, and frosted glass diffusers, explore top-rated fixtures on Amazon to review verified customer dimensions and wiring notes.
Five Costly Hallway Lighting Mistakes to Avoid
Homeowner forums and lighting designer communities routinely identify these five layout blunders. Avoid them to save time, money, and drywall repairs.
Spacing fixtures past ten feet. Placing lights twelve or fifteen feet apart creates dark shadows between doors. Stick strictly to eight-to-ten-foot intervals for continuous overlapping coverage.
Ignoring door swing paths. Mounting a semi-flush fixture too close to a bedroom or linen closet door can cause the door top to strike the glass shade. Measure door swing radius before drilling junction boxes.
Using clear glass shades without diffusers. Bare clear glass exposes bulb filaments directly at standing eye level. This causes harsh glare every time you look down the corridor. Always specify frosted, etched, or milk glass shades.
Skipping wall dimmers. Leaving hallway lights on a standard on-off toggle switch blinds people during midnight bathroom visits. Install a quality dimmer to control ambiance around the clock.
Mixing bulb color temperatures. Screwing a 2700K bulb in one fixture and a 4000K bulb in the next creates an amateur patchwork look. Buy multi-packs of identical bulbs from the same manufacturer run.
For more architectural lighting guidelines covering pendants, chandeliers, and wall sconces, explore our complete Lighting Design and Fixtures guide collection.
Frequently Asked Questions About Hallway Lighting
How far apart should flush mount lights be in a hallway?
Space flush mount lights eight to ten feet apart along the ceiling centerline. Place outer fixtures fifty inches inward from doorway boundaries. This layout creates overlapping light cones that eliminate dark shadow voids between doorways.
How many lumens do you need for a hallway?
Target forty to sixty lumens per square foot across your hallway floor. A standard four-by-twenty-foot hallway requires 3,200 to 4,800 total lumens. Divide this output across your fixtures, aiming for 800 to 1,200 lumens per ceiling light.
Can you use semi-flush mount lights on an 8-foot ceiling?
Only use semi-flush mounts on eight-foot ceilings if the total fixture drop stays under ten inches. Building codes require eighty-four inches of clear walking headroom. True flush mounts dropping three to six inches offer safer, cleaner clearance in eight-foot hallways.
What color temperature is best for hallway ceiling lights?
A warm 2700K to 3000K color temperature works best in residential hallways. It flatters wood floors, complements wall paint, and creates a welcoming transition between rooms without the harsh, sterile blue glare produced by cool 4000K commercial bulbs.
What size flush mount light is best for a narrow hallway?
Choose a fixture ten to twelve inches in diameter for hallways three to four feet wide. Fixtures larger than twelve inches overwhelm narrow ceiling proportions, while fixtures under nine inches look undersized and fail to spread light across walls evenly.
Final Installation Checklist for Hallway Lighting
Measure total hallway length and divide by eight to ten for your fixture count. Strike a chalk line down the corridor ceiling axis. Position outer fixtures fifty inches inside hallway corners. Verify eighty-four inches of clearance below every fixture rim. Install 2700K or 3000K LED bulbs with frosted diffusers. Wire three-way dimmer switches at both corridor entrances.
Taking thirty minutes to calculate these dimensions prevents dark shadow pockets, avoids head bumps, and turns an ordinary corridor into a brightly lit, welcoming architectural pathway.