Peel-and-Stick Backsplash Removal: How to Remove Without Ripping Drywall
Reader Disclosure: This post contains affiliate links. If you buy through them, we may earn a commission at no extra cost to you. We only recommend items tested for clean craftsmanship and authentic durability.
To remove peel-and-stick backsplash tiles without tearing drywall paper, heat each tile surface with a handheld hairdryer on high heat for twenty to thirty seconds to soften the adhesive, then peel gently at a sharp forty-five degree angle using a flexible plastic putty knife. Dissolve any remaining glue residue with a citrus cleaner or mineral spirits to leave your rental wall clean and deposit-ready.
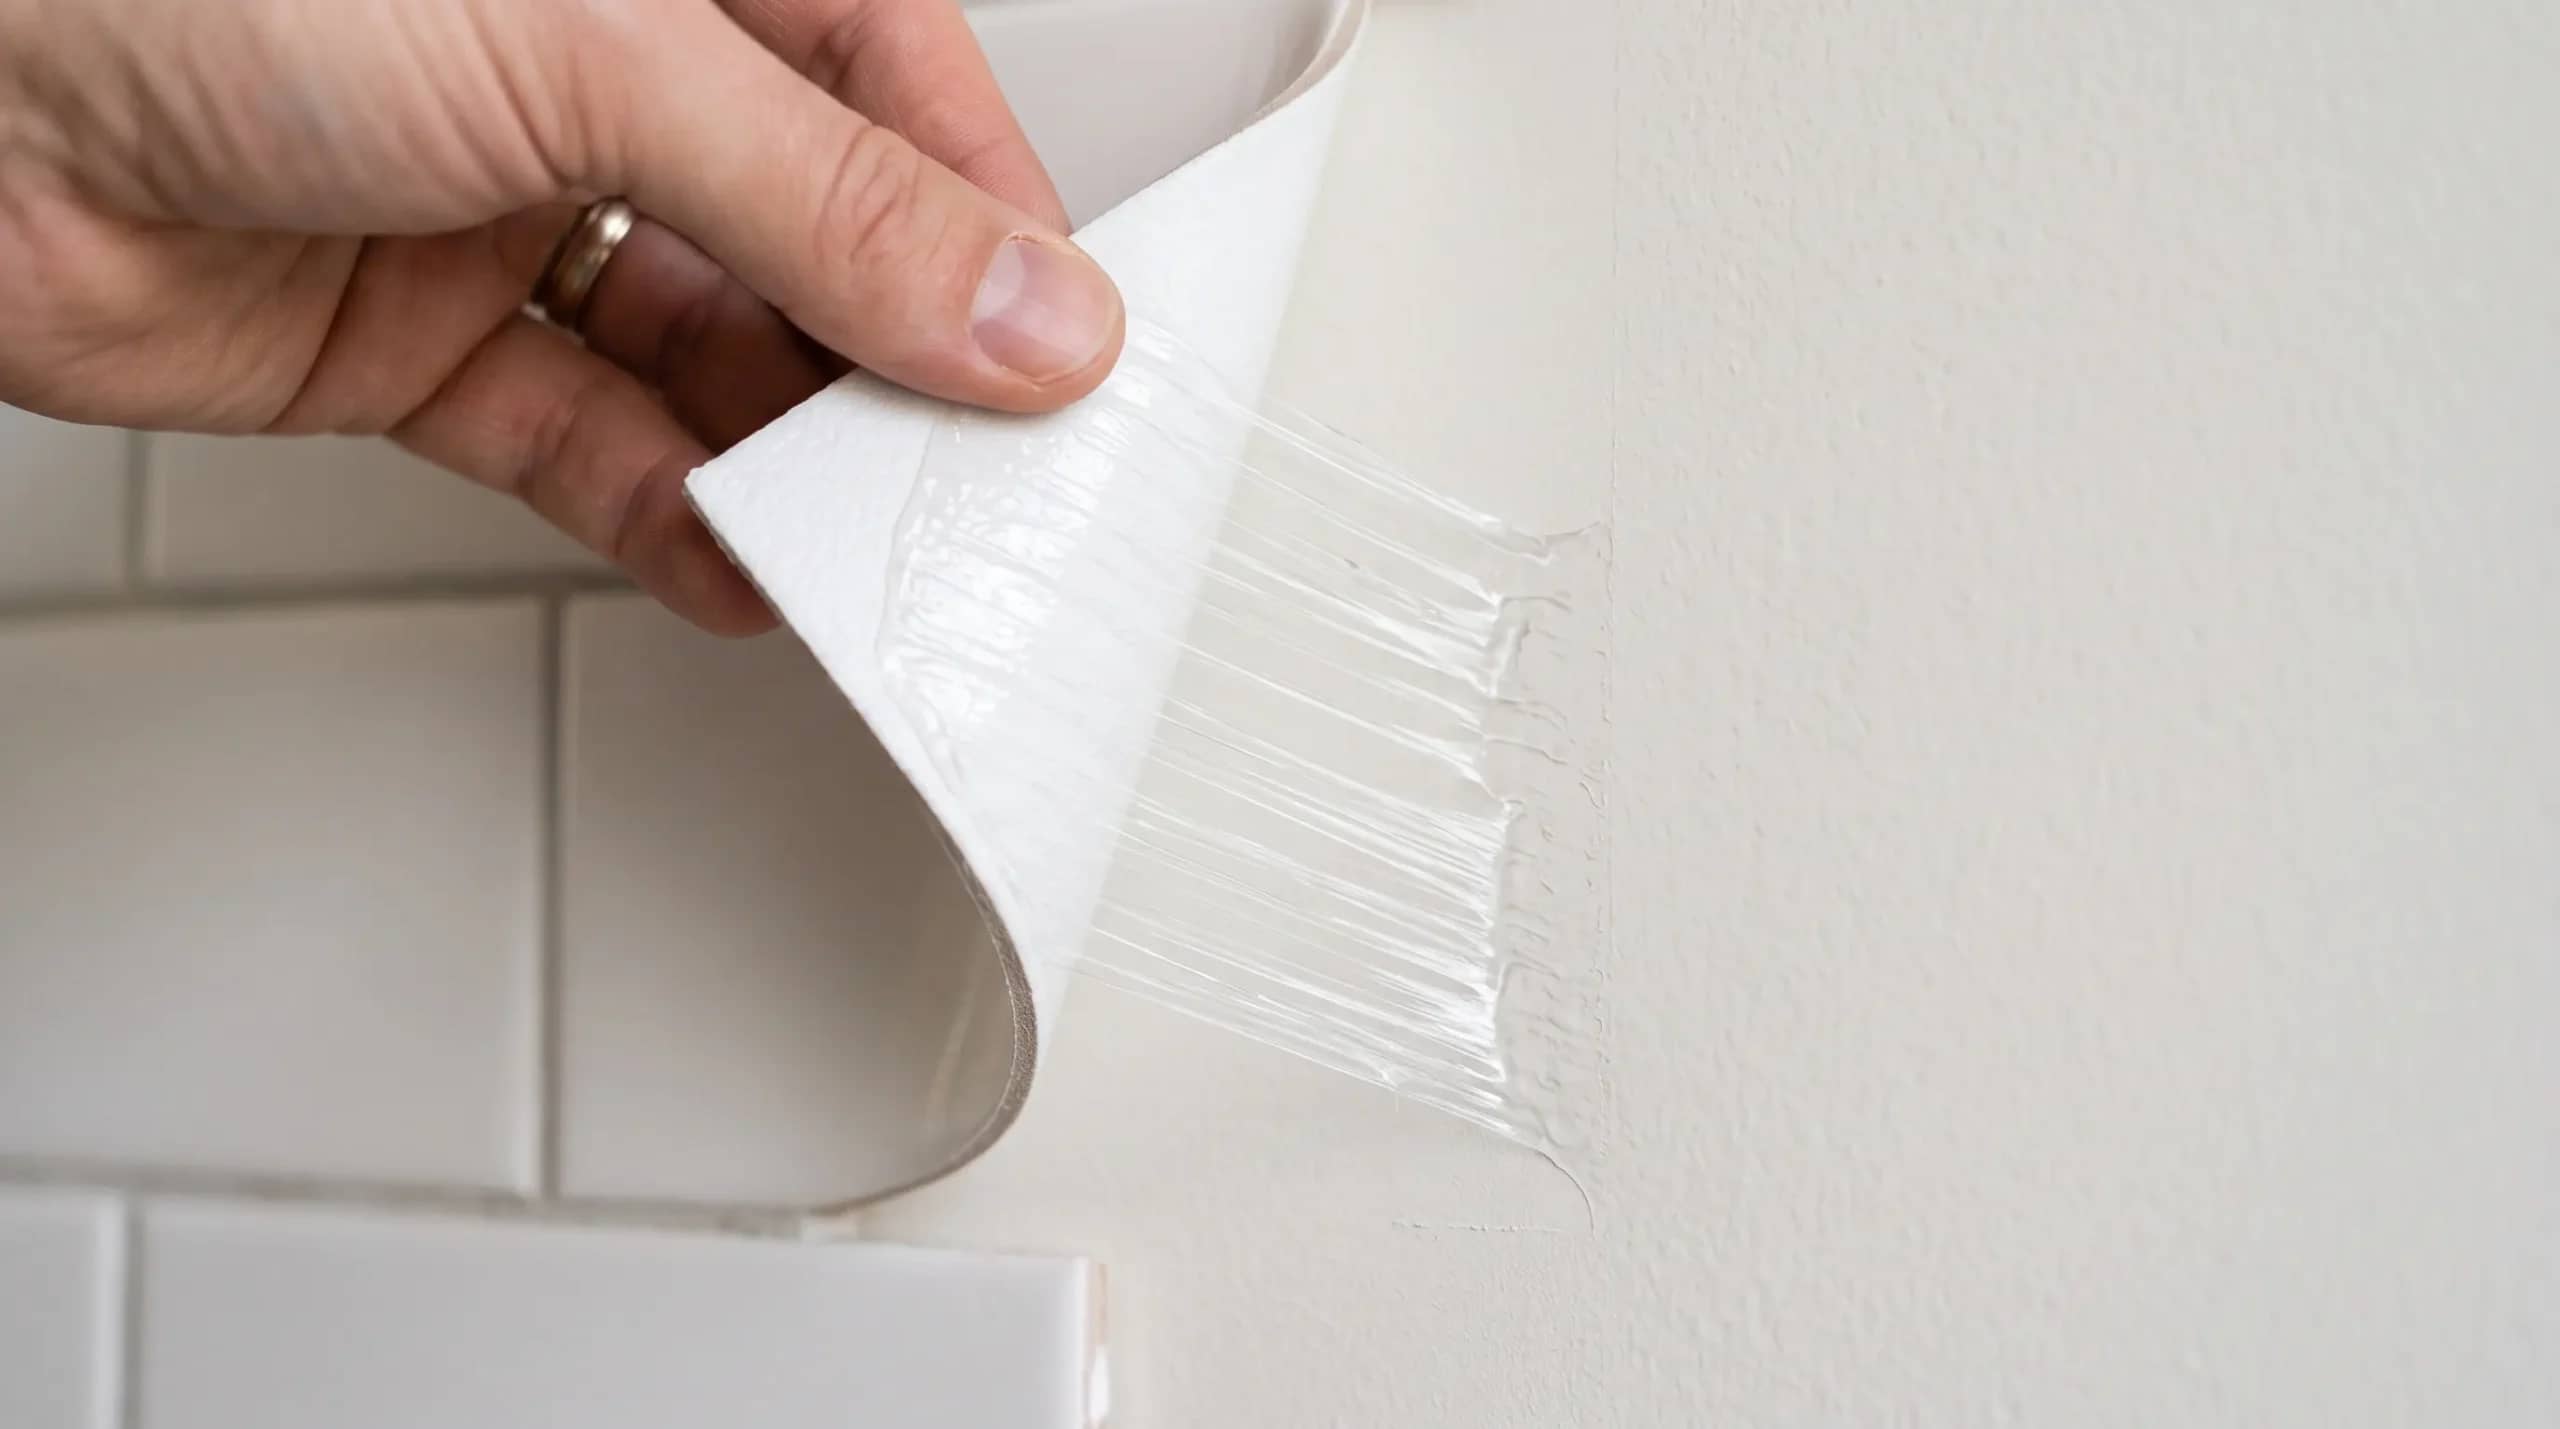
Many apartment renters face panic when move-out day arrives. They pull at the edge of an adhesive backsplash tile with bare hands. A loud ripping sound echoes through the kitchen, and a large chunk of brown drywall paper tears away from the wall. Landlords charge steep repair fees when tenants damage drywall facing during move-out. You can discover more damage-free apartment upgrade ideas in our Rental-Friendly & Small Spaces section.
Before installing new temporary tiles or planning your next rental backsplash project, calculate your square footage and adhesive needs using our interactive Peel-and-Stick Tile Calculator. This tool estimates exact tile counts, trim allowances, and material requirements to save you time and money.
The Chemistry of Peel-and-Stick Adhesives: Why Cold Pulling Rips Drywall
Peel-and-stick tiles use strong acrylic glue that grips drywall paper tightly. Yanking cold tiles tears wall paper fibers away. Commercial manufacturers design these glues to hold heavy vinyl sheets in place through years of cooking steam and kitchen humidity. The adhesive cures deeper into wall paint with every passing month.
Drywall consists of a dense gypsum plaster core sandwiched between layers of recycled paper facing. When you pull an adhesive tile outward at room temperature, the glue bond holds stronger than the thin paper fibers. The force rips the paper layer. This shows the soft brown paper or white plaster underneath. Applying gentle heat lowers the tensile strength of the adhesive. This lets you slide the tile free without harming the wall.
In addition, seasonal temperature swings in a kitchen make cold adhesive brittle. When you tug brittle glue, it acts like tape stuck to dry newsprint. It grips the top fibers of your paint and paper, pulling them up in ragged clumps. Heating the area warms both the vinyl tile and the glue, turning a rigid bond into a flexible film that peels away smoothly.
Drywall Paper Delamination vs Vinyl Flexibility
Thermal energy changes the physical behavior of acrylic glue. Cold acrylic glue acts like a firm solid. When you apply heat with a hairdryer, the glue molecules loosen and turn into a sticky, pliable gel. This change allows the adhesive to stretch and let go of the wall paint.
Heating also softens the vinyl tile body. Cold vinyl is stiff and brittle, which concentrates pulling stress along a narrow tear line on the wall. Warm vinyl becomes soft and rubbery, spreading pulling pressure evenly across a wide surface area. This flexible movement protects delicate drywall paper from sharp localized stress tears.
Gel Tiles vs Heavy Metal Composite Tiles
Thin gel stickers pull off much faster than heavy metal or stone tiles. Gel stickers use a thin coat of water-based or mild acrylic adhesive. You can warm and peel them in fifteen to twenty seconds per sheet with minimal effort.
Thick metal tiles rely on heavy black foam tape or strong glue backing. These heavy adhesives support real metal weight against gravity. Removing composite tiles takes forty to sixty seconds of continuous heat per tile. You must work slowly with a flexible plastic blade to slice through the softened foam core.
The Hairdryer and Plastic Scraper Removal Protocol
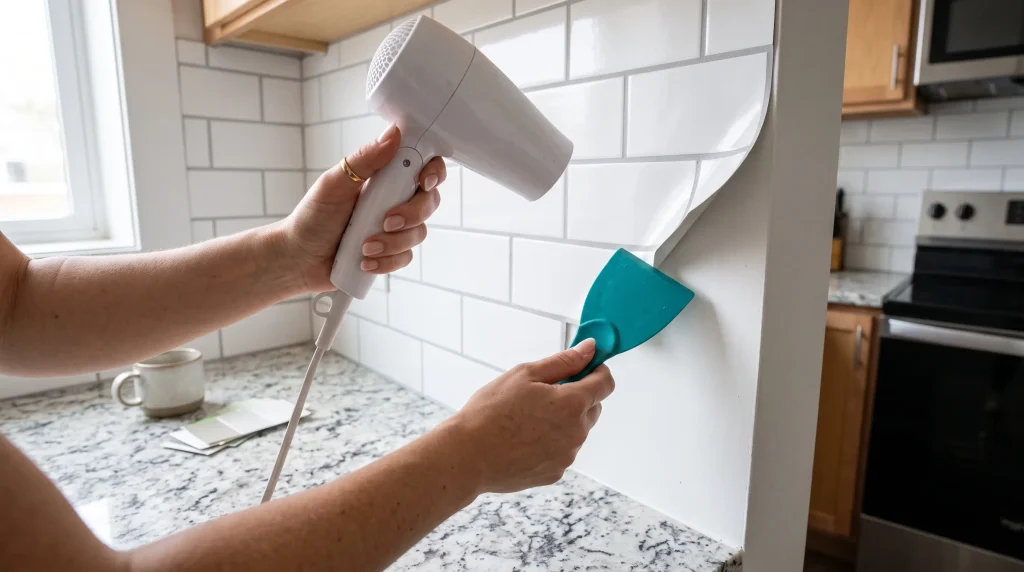
Heat each tile for twenty to thirty seconds with a hairdryer on high heat, slide a flexible plastic putty knife under a loosened corner, and peel the tile backward at a sharp forty-five degree angle. This systematic method keeps the pull force parallel to the wall, preventing the outward leverage that rips paper facing.
Work across your backsplash in small, controlled sections of two to three tiles at a time. Never try to rip off an entire sheet in one quick motion. Patience is your best asset when protecting your security deposit. If you feel sudden resistance while peeling, stop pulling immediately. Apply another fifteen seconds of warm air, and resume peeling slowly.
Always start your removal work in a hidden spot, such as behind your microwave. Starting in a hidden corner lets you test how quickly the glue responds to your hairdryer. It also lets you see whether the previous tenant or landlord used proper primer on the drywall before applying the tiles.
Step-by-Step Tool Setup and Safe Temperature Limits
Gather three basic tools before you begin: a standard household hairdryer, a flexible plastic putty knife, and an extension cord. Always use a plastic scraper instead of a metal scraper. Sharp metal blades easily gouge drywall and slice through latex wall paint.
Avoid using commercial heat guns from hardware stores. Work heat guns reach over seven hundred degrees Fahrenheit. That extreme heat can scorch drywall paper, bubble interior latex paint, melt vinyl into harsh smoke, and ignite hidden electrical wiring behind kitchen outlet boxes. A standard bathroom hairdryer produces safe heat between one hundred twenty and one hundred forty degrees.
Maintaining a Low-Angle Peel to Protect Drywall Paper
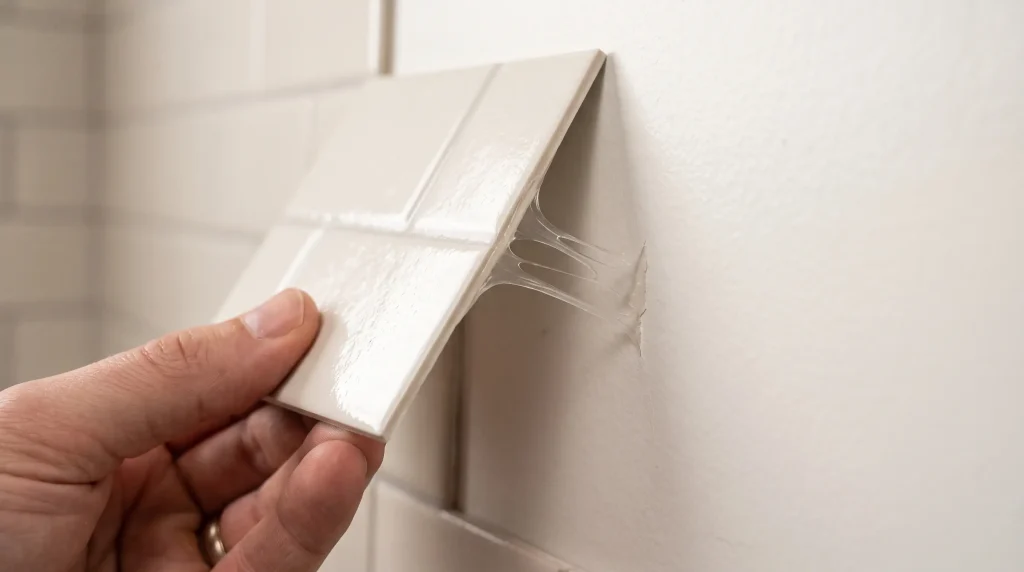
The angle at which you pull the tile determines whether your drywall survives intact. Never pull tiles straight outward at a ninety-degree angle. Pulling straight out lifts drywall paper off the gypsum wall.
Fold the loose tile edge back over itself at a sharp forty-five degree angle. Roll the tile down slowly with your fingers close to the wall. This low-angle technique applies shear force along the adhesive layer, causing the glue to release from the paint surface while leaving the wall paper completely flat.
Dissolving Stubborn Adhesive Residue Without Ruining Paint
Saturate leftover sticky adhesive residue with a citrus-based solvent or odorless mineral spirits, let the liquid penetrate for five full minutes, and gently wipe it away using a warm damp microfiber cloth. Softening the glue residue with mild solvents removes sticky grime without requiring aggressive scraping that damages wall paint.
After you peel away the vinyl tile shells, you will often find yellow or clear adhesive patches stuck to the wall. Do not try to scrub this glue off dry. Dry scrubbing smears the adhesive into a messy film that attracts black dust and grease. Mild cleaners break down the sticky glue into a soft liquid.
Apply the solvent with a clean cotton rag or a soft foam brush. Work in two-foot squares so the liquid does not evaporate before it softens the glue. As the cleaner penetrates the gummy layer, you will notice the clear adhesive turn milky and soft. Use your plastic putty knife to push the soft residue into a rag, wiping the blade clean after every pass.
Why Harsh Solvents Like Acetone Strip Underlying Paint
Never use acetone, nail polish remover, or lacquer thinner on painted drywall. These aggressive solvents dissolve the acrylic resins in standard interior latex wall paint within seconds. Using acetone leaves large bleached rings, runs, and bare drywall patches across your kitchen backsplash.
Stick to safe citrus-based cleaners like Goo Gone or odorless mineral spirits. Mineral spirits clean off sticky glue without hurting dried wall paint. Test any solvent on a hidden test spot behind your stove or refrigerator first to verify paint compatibility before treating the entire wall.
Degreasing the Wall with Dawn Dish Soap After Removal
Once you remove all sticky residue, wash the entire wall with warm water mixed with a few drops of grease-cutting dish soap. Citrus cleaners leave oily residues that create shiny spots on flat wall paint. A quick soapy wash removes all chemical traces.
Wipe the drywall clean with a damp towel, then dry the surface with a fresh microfiber cloth. Inspect the clean wall with a flashlight held at a sharp angle to check for any missed glue spots or light scuffs. A spotless, grease-free wall ensures a stress-free move-out walk-through with your property manager.
Repairing Minor Drywall Paper Tears for Security Deposit Return
Seal exposed brown drywall paper tears with an oil-based primer or shellac spray to prevent bubbling, apply a thin coat of lightweight spackle, sand the patch smooth with 220-grit sandpaper, and touch up with matching wall paint. Taking thirty minutes to patch small tears stops landlords from taking your deposit money.
Even with careful heat, a small bit of paper might pull off in an old apartment. Do not panic. Small surface tears are simple to repair if you follow the correct sequence of materials. The golden rule is sealing the torn paper before touching it with wet wall mud.
If you skip the primer step, water in the spackle soaks into the raw brown kraft paper, making it swell like wet cardboard. Once the paper bubbles up, sanding only tears more paper away. A quick spray of shellac primer creates a waterproof barrier that keeps your patch flat, smooth, and invisible to the naked eye.
The Shellac / Oil Primer Rule to Stop Spackle Bubbles
When drywall paper tears, it exposes raw brown kraft paper fibers. If you apply water-based spackle directly over raw brown paper, the paper absorbs moisture and blisters into puffy bubbles that never lay flat. You must seal the paper fibers with a quick-drying oil-based spray primer like Zinsser BIN or Cover Stain first.
Spray a light coat of shellac primer over the torn spot and let it dry for fifteen minutes. Once dry, smooth a thin layer of lightweight joint compound across the depression with your plastic putty knife. Feather the edges flat against the surrounding wall paint, let it cure for two hours, and sand smooth with fine 220-grit sandpaper.
The Painter Tape Barrier Hack for Future Rentals
For future rental apartments, apply high-adhesion blue painter tape across your entire kitchen drywall surface before sticking on your tiles. Stick your peel-and-stick tiles directly onto the painter tape backing. The strong tile glue bonds to the smooth tape surface, while the gentle painter tape protects the wall underneath.
When moving day arrives, you peel the painter tape off the wall in clean sheets with zero heat, zero chemicals, and zero drywall damage. This simple trick saves hours of cleaning time and guarantees complete return of your security deposit.
Peel-and-Stick Backsplash Types and Removal Difficulty Comparison
Evaluating adhesive backsplash types shows that thin gel stickers release quickly with moderate heat, whereas rigid metal and stone tiles require extended heat cycles and careful blade guidance. Review the detailed comparison matrix below to plan your removal time and pick the right cleanup solvent.
| Backsplash Material Type | Adhesive Formulation | Required Heat Dwell Time | Drywall Damage Risk | Best Residue Cleaner |
|---|---|---|---|---|
| Thin Gel / Vinyl Stickers | Mild acrylic pressure adhesive. | 15 to 20 seconds with hairdryer. | Very low damage risk on painted walls. | Warm soapy water or citrus spray. |
| Faux Stone Composite Tiles | Heavy polyurethane glue backing. | 30 to 45 seconds with medium heat. | Moderate risk if pulled quickly. | Odorless mineral spirits. |
| Metal & Aluminum Tiles | High-tack industrial foam tape. | 40 to 60 seconds with steady heat. | High risk without patient warming. | Citrus adhesive remover spray. |
| Over-Painter-Tape Installation | Taped barrier backing. | 0 seconds without heat required. | Zero risk with clean release. | Dry microfiber cloth wipe. |
| Heavy Glass Composite Panels | Dense silicone adhesive grid. | 50 to 70 seconds with steady warmth. | High risk on unprimed drywall. | Specialty silicone solvent wash. |
Frequently Asked Questions About Removing Peel-and-Stick Backsplash
Direct answers to common rental questions regarding heat guns, wall residue cleanup, drywall patching, and move-out inspection standards.
Does peel-and-stick backsplash damage rental drywall?
Peel-and-stick tiles will rip drywall paper if pulled off cold. However, heating each tile with a standard hairdryer softens the adhesive glue, allowing tiles to peel away cleanly without damaging underlying drywall.
Can you use a heat gun to remove peel-and-stick tile?
Use a standard household hairdryer instead of an industrial heat gun. Heat guns reach extreme temperatures over seven hundred degrees, which can scorch drywall paper, melt vinyl into toxic smoke, or trigger dangerous wall fires.
How do you get sticky residue off walls after removing tile?
Spray a citrus-based adhesive remover or rub odorless mineral spirits over the gummy residue. Let it soak for five minutes to dissolve the acrylic adhesive, then wipe it clean using warm water and dish soap.
What is the painter tape trick for peel-and-stick tile?
Line your kitchen wall with blue painter tape before installing peel-and-stick tiles. Affix tiles directly onto the tape backing. When moving out, peel the tape away smoothly without ripping drywall paper or pulling off wall paint.
How do you repair ripped drywall paper after tile removal?
Seal exposed brown drywall paper with shellac or oil primer to prevent water bubbling. Let it dry, spread a thin layer of wall spackle, sand flat with 220-grit paper, and repaint the spot with matching kitchen paint.