How to Cover Ugly Rental Bathroom Floor Tiles Without Damaging the Subfloor
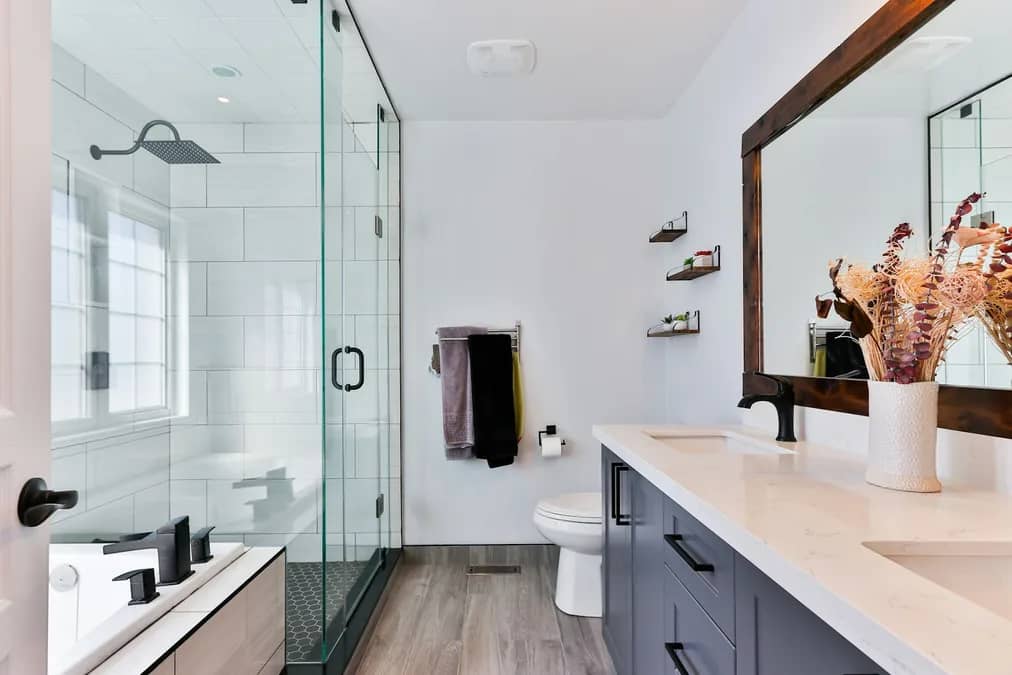
To cover ugly rental bathroom floor tiles without damaging the subfloor or forfeiting your security deposit. Choose between four field-tested renter methods: loose-lay sheet vinyl cut from a kraft paper template. peel-off peel-and-stick vinyl tiles laid over flat ceramic. locking elevated teak deck tiles. Or an large washable cotton runner rug paired with a natural rubber pad. Each approach conceals outdated landlord finishes. Preserving the base tile glaze during move-out inspections.
Reader Disclosure: This post contains affiliate links. If you buy through them. We may earn a commission at no extra cost to you. We only recommend renter-safe short-term flooring. Damage-free removal supplies tested for clean craftsmanship.
Moving into an apartment with discolored ceramic mosaics. Chipped linoleum. Or stained brown grout lines at once diminishes daily comfort. Yet tenants cannot simply chip away ceramic or lay lasting mortar without facing steep financial penalties. The ideal rental floor solution must resist bathroom steam. Prevent water leaks. Install without special power tools.. Peel away in under an hour. Your lease expires.
How to Cover Ugly Rental Bathroom Floor Tiles: 4 Renter-Safe Methods
Selecting the right short-term floor covering depends directly on your bathroom moisture levels. The depth of your existing grout joints.. Your personal DIY patience. The guide matrix below outlines the cost. setup time. Moisture strength.. Deposit risk across all four practical answers.
| short-term Method | Typical Material Cost | setup Time | Moisture Resistance | Security Deposit Risk Level | Best Use Case |
|---|---|---|---|---|---|
| Loose-Lay Sheet Vinyl | $40 to $90 total | 2 to 3 hours | 100% water-safe surface | Zero risk (zero adhesive used) | Standard rental bathrooms needing smooth, glue-free coverage |
| Peel-and-Stick Tiles | $1.20 to $2.50 per sq ft | 3 to 5 hours | High (repels surface splashes) | Low to moderate (requires heat removal) | Renters seeking trendy Moroccan or checkerboard patterns on flat tile |
| locking Teak Tiles | $3.50 to $6.00 per sq ft | 45 to 60 minutes | Exceptional (natural water drainage) | Zero risk (free-floating plastic grid) | Large master baths with at least one inch of door space |
| Washable Cotton Runner | $25 to $55 total | 5 minutes | Moderate (absorbs water, machine washable) | Zero risk (safe rubber backing) | Narrow galley bathrooms or strict zero-effort leases |
While peel-and-stick tiles receive immense social media attention. Seasoned apartment renovators recognize that each method serves a distinct architectural scenario. For instance. Homes with deep grout lines require different stabilization than flat vinyl sheet underlayments. Review the detailed setup protocols below before purchasing materials.
Method 1: Loose-Lay Sheet Vinyl Over a Kraft Paper Template (The Reddit Favorite)
The floating sheet vinyl technique represents the single safest method to cover rental bathroom tiles. It uses zero glues against the landlord subfloor. You create a custom template of your bathroom footprint using brown kraft paper. Transfer the exact contours onto a single sheet of padded vinyl.. Drop the cut sheet directly over the existing floor.
Renters across home improvement communities widely endorse this approach as the ultimate lease-friendly compromise. Because the vinyl material spans the entire floor in one contiguous piece. It presents no seams where bathwater can seep between cracks. When move-out day arrives. You simply pick up the outer. Roll the vinyl sheet into a tube.. Pack it into your moving van. The original landlord tiles remain fully untouched beneath.
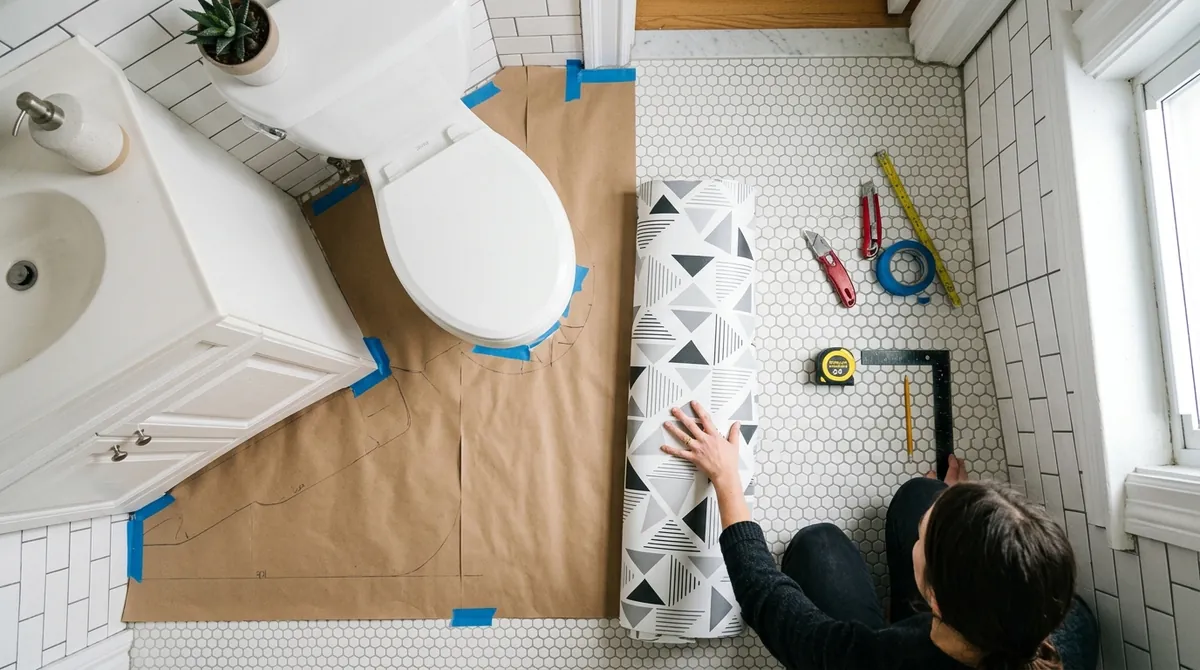
To execute this setup, purchase a roll of heavy-duty brown kraft paper and painter tape. Lay sheets of kraft paper flat across the bathroom floor. Overlap each paper seam by two inches. Cut small slit triangles around the porcelain toilet pedestal. Vanity corners.. Heating vents. Press the paper firmly into baseboard corners using a metal putty knife. Then crease. Trim the paper with a fresh utility knife blade.
Tape all paper seams together with wide masking tape to create a rigid. One-piece floor pattern. Carefully lift the paper template. Carry it into a larger room or hallway.. Unroll your chosen padded sheet vinyl flooring roll flat on the floor. Pin the paper template over the top decorative face of the vinyl with painter tape. Trace the outer with a fine-tip lasting marker. Allow an extra eighth-inch buffer along exterior walls for final outer trimming.
Cut the vinyl with ease using sharp heavy-duty shears or a utility knife guided by a metal ruler. Carry the pre-cut vinyl piece back into the bathroom. Drop it into position. The natural weight of fiberglass-backed sheet vinyl holds it firmly in place without sliding. To finish the setup. Block shower splashes from creeping under the vinyl edges. Run a clean bead of peel-off peelable short-term caulk along the bathtub apron and vanity kickplate.
Method 2: peel-off Peel-and-Stick Vinyl Tiles (The High-Impact Pattern Choice)
peel-off peel-and-stick vinyl tiles deliver stunning visual transformations by mimicking high-end encaustic cement. Black-and-white checkerboard. Or polished marble surfaces at a fraction of the cost. High-quality renter vinyl tiles feature a low-tack pressure-delicate adhesive that bonds firmly to clean ceramic. Releasing cleanly. Heated with a hair dryer.
However. Successful peel-and-stick setup requires navigating two specific pitfalls that catch unprepared renters off guard. First. If your existing ceramic floor features deep. Wide grout lines exceeding one-eighth of an inch. Thin vinyl tiles will gradually sag into the dents under the weight of human heels. This structural sagging creates a visible sunken grid pattern known as telegraphing. Second. Stray water splashes near the bathtub edge can dissolve pressure-delicate glues over time. This moisture breaks down the adhesive bond. Produces a gummy white residue.
Select thick, store-grade peel-off peel-and-stick vinyl floor tiles with a textured safe wear layer. Select tiles engineered specifically with low-tack. Pressure-delicate backing. Avoid heavy-duty store mastic formulas. If your ceramic grout lines feel noticeably deep. Fill the joints with peel-off vinyl joint tape or lay a thin paper vapor barrier across the floor before applying adhesive tiles.
Thorough surface prep dictates your final outcome. Scrub the landlord tiles with a fifty-fifty mixture of isopropyl alcohol. Warm water to strip away dried hairspray. Soap scum.. Floor wax residues. Allow the ceramic to dry fully for at least two hours. Moisture trapped under adhesive tiles prevents bonding. Accelerates adhesive degradation.
set a square reference line from the center of the room toward the primary door limit. Peel the safe wax backing from each tile. Press it firmly into position with a hand roller. Work outward toward the walls in concentric rows. For curved cuts around the toilet base. Cut a flexible cardboard contour gauge to duplicate the porcelain curve before slicing through the vinyl face with your blade.
Method 3: locking Teak and Acacia Wood Decking Tiles (The Nordic Spa Aesthetic)
locking wood decking tiles convert an ordinary. Clinical apartment bathroom into a warm Scandinavian spa retreat without introducing a single drop of adhesive or tape. Each twelve-by-twelve-inch tile consists of solid teak or acacia hardwood slats mounted on top of an elevated polypropylene plastic drainage grid.
The locking snap-together loop connectors lock adjacent tiles together firmly. This connection creates a rigid floating wooden surface directly above the original ceramic tile. Because the tiles float half an inch above the existing surface. Bath splashes. Condensation drain freely beneath the wooden slats without contacting the wood fibers directly. Teak wood contains natural organic oils that resist moisture rot. Bacterial mildew.. Splintering.

Before ordering locking teak bathroom floor tiles, you must measure your bathroom door space with precision. Most locking wood tiles measure between 0.75. 0.90 inches in total assembled height. Open your bathroom door inward. Measure the vertical gap between the bottom door edge. The existing ceramic floor. If your door space measures less than three-quarters of an inch. The door sweep will scrape hard against the wooden slats. This friction prevents the bathroom door from opening freely.
Tenants must also consider ongoing household hygiene with open slat flooring. Hair. Soap residue.. Dust naturally settle through the narrow gaps into the plastic grid below. Plan to unclick the tiles in large sections every four to six months to vacuum. Mop the original ceramic floor underneath. This regular maintenance prevents mold buildup. Keeps the bathroom smelling fresh.
Method 4: large Washable Cotton Runner Rugs (The Zero-Effort 5-Minute Solution)
When lease restrictions strictly prohibit any floor modifications. An large washable cotton runner rug provides immediate visual relief in five minutes flat. Never scatter tiny disjointed bath mats that leave eighty percent of the floor exposed. Roll out a generous two-and-a-half by eight-foot woven cotton runner down the center spine of the room.
An expansive runner conceals the primary walking path between the doorway. Vanity.. Shower stall. Thick ribbed cotton or tufted jacquard weaves absorb water drips. Muffle hollow bathroom footstep echoes.. Introduce rich tactile warmth under bare feet on cold winter mornings.
Never lay a cloth bath runner directly over slick porcelain tile without anchoring the bottom. Conventional inexpensive PVC plastic mesh pads contain chemical plasticizers that can react with bathroom floor moisture. These chemicals can permanently discolor and yellow base rental flooring. Always pair your runner with a dedicated 100% natural rubber non-slip rug pad. Natural rubber provides strong non-slip floor grip without off-gassing or bonding to base finishes.
Select an extra large washable cotton bath runner rug designed for regular home washing machines. Launder the runner every two to three weeks on a gentle warm cycle to maintain sanitary conditions. Prevent musty odors in enclosed apartment bathrooms.
Step-by-Step setup: How to Lay Peel-and-Stick Tile Without Floor Damage
Executing a damage-free peel-and-stick setup requires following strict surface prep. outer protection protocols. Follow these four sequential steps to achieve a smooth finish that protects your security deposit.
Step 1: Deep Degrease with Isopropyl Alcohol. Sweep away all loose dust, hair, and grit. Mop the existing tile with a grease-cutting detergent solution. Followed by a thorough wipe-down using ninety-one percent isopropyl alcohol. This step eliminates hidden body oils. Soap residues that cause tile adhesive to slip during setup.
Step 2: set a Centered Chalk Baseline. Measure the width. Length of the room to locate the exact center point. Snap perpendicular chalk lines to divide the floor into four balanced quadrants. Lay out loose tiles without peeling their backs to verify that outer edge pieces will not end in awkward slivers narrower than two inches.
Step 3: Scribe Fixtures with Kraft Paper Templates. Do not attempt to guess cuts around the toilet flange or radiator pipes. Tape heavy kraft paper around the curved base. Trace the porcelain curve with a carpenter pencil.. Cut along your pencil line. Transfer this paper outline onto the vinyl tile surface before making your final slice.
Step 4: Seal Wet Perimeters with Peelable Silicone. Run a slender bead of peel-off peelable caulk along the bathtub seam. Shower limit. This hidden water-safe barrier stops stray shower water from sneaking beneath the tile edges. Peelable caulk cures into a flexible rubber gasket that peels off in one full strip. You move out.
Move-Out Protocol: How to Remove Peel-and-Stick Tile in 45 Minutes
When your lease concludes. Remove short-term peel-and-stick vinyl tiles using gentle heat. Never force cold tiles off the floor with strong scraping. Forcing cold tiles off the floor snaps brittle vinyl. Leaves thick patches of tacky glue behind on the landlord ceramic.
Plug in a standard handheld hair dryer or an adjustable low-heat craft gun. Direct hot air across the surface of the first corner tile for twenty to thirty seconds. Thermal warmth releases the bond. Turns the adhesive into a soft. Pliable gel. Slip a flexible plastic putty knife under the heated tile corner. Peel the tile upward at a forty-five-degree angle. Never use a metal razor scraper. As sharp metal corners will permanently scratch the original ceramic tile glaze.
If small patches of tacky adhesive residue linger on the ceramic surface. Spray the floor lightly with citrus adhesive remover spray. Allow the citrus solvent to penetrate the gummy residue for ten minutes. Wipe the loosened glue away with a clean microfiber towel or nylon abrasive pad. Finish by mopping the floor with warm water. Dish soap to eliminate any remaining solvent film before your final landlord walk-through.
Frequently Asked Questions About Covering Rental Bathroom Floor Tiles
Will peel-and-stick floor tiles ruin the subfloor or tile when removed?
High-quality peel-off peel-and-stick vinyl floor tiles will not ruin glazed ceramic tile or concrete subfloors. Removed with heat. However. Applying adhesive tiles over unsealed hardwood. Cheap laminate. Or existing peeling linoleum carries a higher risk of pulling up base surface finishes during move-out removal.
How do you prevent peel-and-stick tiles from sinking into grout lines?
Prevent vinyl tiles from sinking into wide grout dents by choosing thicker store-grade vinyl (at least 1.5 to 2 millimeters thick). Alternatively. Fill deep grout lines with peel-off vinyl seam tape or choose the loose-lay sheet vinyl method to span grout joints without telegraphing indentations.
Can water from the shower get under short-term tiles and cause mold?
Water can seep beneath tile edges along the bathtub apron if seams remain unsealed. Protect against moisture leaks. Fungal mildew by running a full bead of short-term peelable silicone caulk along the bathtub base. Vanity outer at once after laying your floor covering.
What is the easiest way to cut tiles around a curved toilet base?
The easiest way to cut tiles around a toilet pedestal is building a paper contour template. Cut heavy brown kraft paper with relief slits around the porcelain curve. Tape the shape into a solid pattern.. Trace the outline onto your vinyl tile face before cutting with a utility knife.
Can you use peel-and-stick tiles over textured or slate floors?
Peel-and-stick vinyl tiles will not adhere reliably to rough cleft slate or heavily embossed rustic tiles. Texture prevents full adhesive contact. For textured floors. Choose loose-lay padded sheet vinyl or locking elevated teak deck tiles instead.